
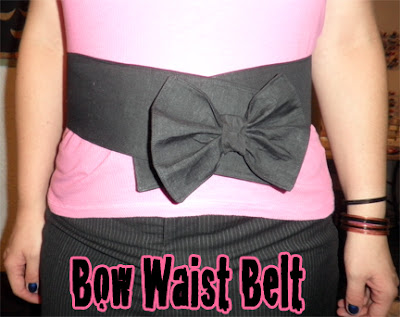
Guest Blogger:: Thera Joyce - Bow Waist Belt Tutorial
Hey guys! Firstly I just want to say I am enjoying everyone's commenting! I really appreciate it and I read every single one! You guys are the best! ((I wish blogger had a better commenting format so that I could reply to you individually!))
Secondly do I have a surprise for you! I asked my clever friend Thera Joyce from the Crafty Pirate if she would come over to the trailer park and do some guest blogging! She has a really cool blog I could get lost in for hours, so if you havn't already, go check her out! Thera has kindly shared a brand new tutorial with us! Anyway, here she is!
Hello Everyone! My name is Thera Joyce and my blog is called Crafty Pirate. Max has asked me to be a guest blogger for her blog and I'm super excited about it! We're going to have so much fun! I write a lot of tutorials. Most are inspired by high priced fashion items that I could never afford, so I make them. I also love to repurpose things, so I'll be showing you how to turn things laying around your house into fashion items. I love Alternative/Indie/DIY fashion. I have my own unique style and could care less about trends. I'm a self professed nerd and craftaholic as well. I love zombies, horror movies, vampires, hot pink, cupcakes, Batman, sewing, crafting, painting, skulls, pirates, shoes and handmade stuff. I currently reside in St. Louis, MO but I'm originally from Phoenix, AZ. I share a home with my super awesome hubby Wil and my chihuahua Higgins. So without further ado, lets get crafting!! ((Max - is there any doubt why we get along? her intro reads like my life! except replace chihuahua with son))
I've been seeing these cute bow waist belts all over the place. I am so in love with them! The only problem is, some of them are pretty pricey. I decided to try my hand at making one and it came out great! Here's the tutorial so you can make your own. The options are endless.
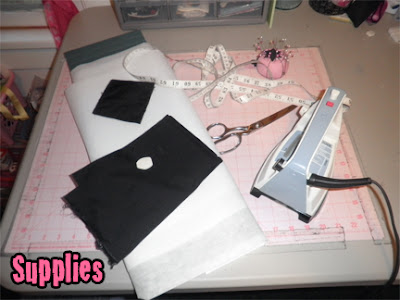
You will need:
Fabric of your choice (1/2 yard)
Chalk
Craft Fuse
Pins
Measuring Tape
Iron
Scissors
3 1/2 x 4 Inch Piece of Velcro
(mine was salvaged off some paintball gear)
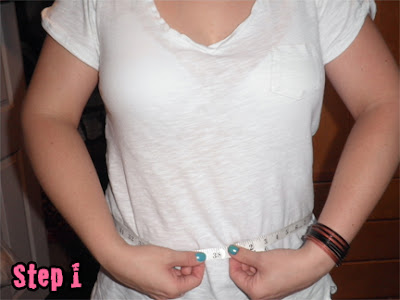
You'll need to take your waist measurement. A waist belt sits at belly button level. Make sure the measuring tape isn't too snug. If you want your belt to sit lower, measure where you'd like it to sit.

Add 5 inches to your waist measurement. Your belt will be 4 inches wide so add 1/4 inch for seam allowances. Cut two.
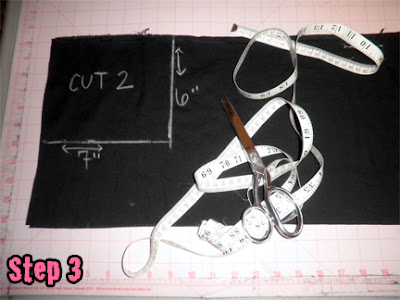
Measure out a 6 inch by 7 inch square. Cut two. This will be your bow.
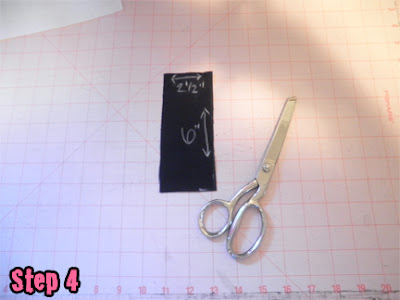
Now measure out a 2 1/2 inch by 6 inch rectangle. Cut 1. This will be the tie for the bow.
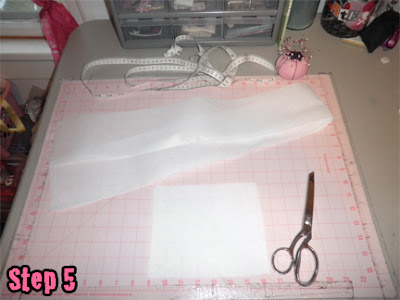
You will need to cut 1 belt piece and one bow piece out of the Craft Fuse (extra firm iron on interfacing). I usually just use the pieces I've already cut out as pattern pieces. Just lay them on top of the Craft Fuse and cut!
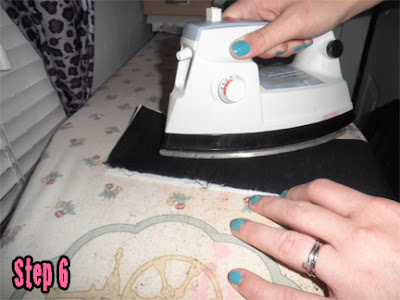
Iron the Craft Fuse onto one piece of the belt and one piece of the bow. Make sure you iron the Craft Fuse onto the wrong side of the belt and bow piece.
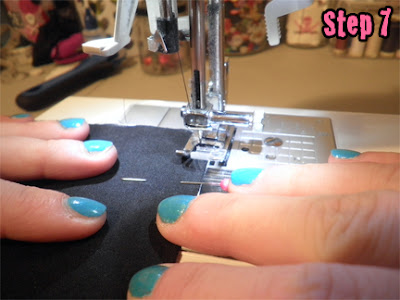
With right sides together, stitch along the outside edge of the belt pieces. Make sure to leave a small hole for turning the belt right side out. I left my turning hole along one of the long sides of the belt.
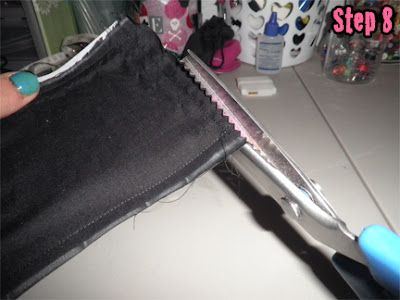
Using pinking shears, cut the excess seam allowance off. Make sure you don't cut into your stitches.
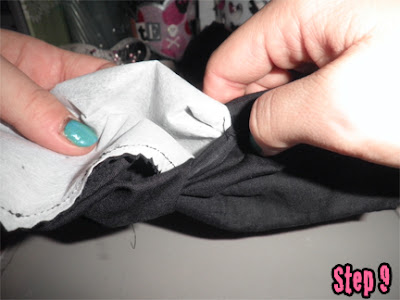
Now turn the belt right side out. You can use your iron to press the edges of the belt flat.
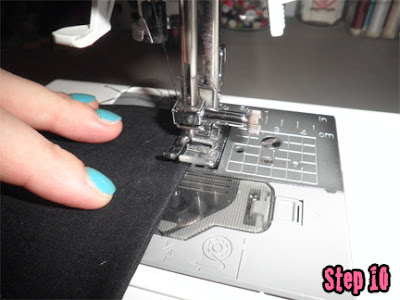
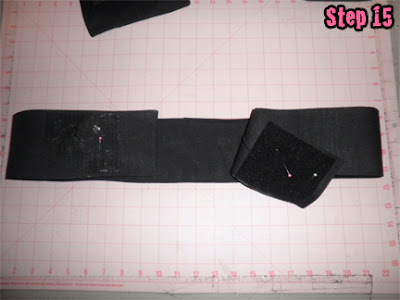
Topstitch along the outside edge of the belt. This gives the belt a nice finish and also closes your turning hole. Set the belt aside.
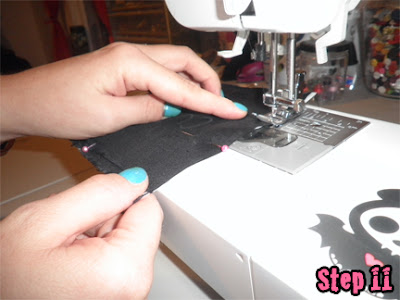
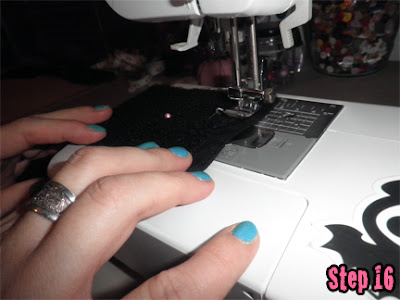
With right sides together, stitch the bow pieces together. Make sure to leave a turning hole.

Turn the bow right side out and use your iron to flatten the edges. Topstitch along the outside edge of the bow.
Now, fold the bow tie in half so it's width is now about an inch. Stitch down the long side of the piece.
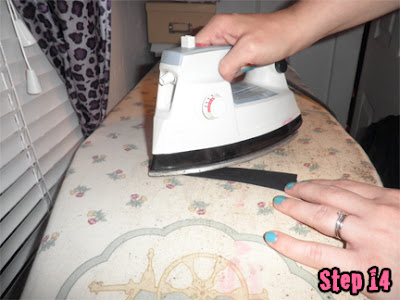
Turn the bow tie right side out and press flat. I usually press this piece so the seam is in the center of the back of the piece. Set the bow pieces aside.
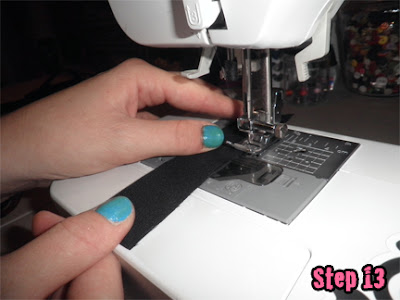
Try the belt on and position the velcro where you'd like. Pin.
Stitch the velcro to the belt.

Now grab the large part of the bow. Gather the bow by sewing a running stitch down the middle of the bow. Gather, then wrap the excess string around the center of the bow a few times.
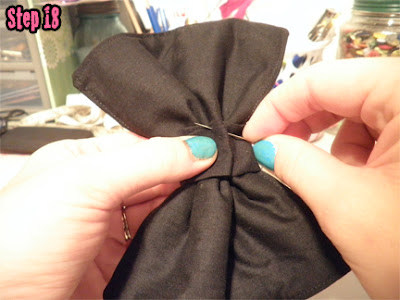
Now stitch the bow tie around the center of the bow.

Put the belt on again and position the bow where you'd like. Pin. Stitch the bow onto the belt.
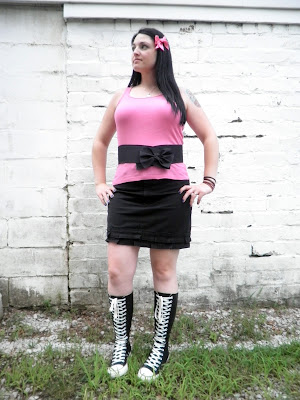
You're done! Admire your super cute bow waist belt!
Now you can make one in every color and pattern. I know I am.

Thanks Thera Joyce that looks SO DAMN CUTE! I can't wait to try it out! If you guys make one send her an email ((therajoyce@gmail.com)) so we can show it off!


 • www.max-california.com")

3 comments
Really cool idea!
ReplyDeleteMy thera joyce! great tutorial! i wish my sewing skills didnt suck so bad.
ReplyDeletemax i heart your blog :)
I love this tutorial! Also, as a sidenote I just checked out Thera Joyces' blog, and I think I'm in love.
ReplyDeleteI love comments!