Today you're going to learn how to make this dress!
 |
| Did you know that Doc Martens are Jedi Council approved footwear for every padawan? |
I aimed to make a dress that was modelled after the Jedi clothing, but something that I could wear outside the house and conventions! This is NOT supposed to be an accurate costume, it's a nod to the Jedi while still looking hell yeh hot! The robe I made as a mini dressing gown to keep me warm and snuggly. I used brown fleece for comfort, but you can totally use a thin cotton poplin if it is hot where you live, or a heavier drill fabric for something more weighty.
The robe tutorial will be up later this month, so let's work on the dress first!
Ready for the tutorial?
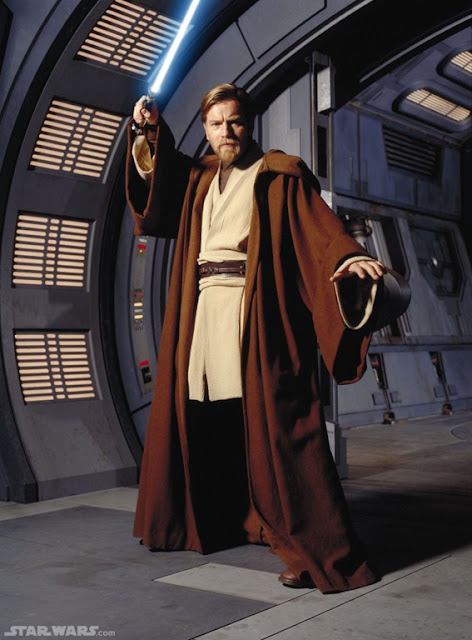
Here is one of the reference pics I used.
 |
| I love that it looks like he has no legs |
Help me Obi-Wan Kenobi! You're my only hope!
Remember how you made a pattern from your favourite shirt? I made a pattern from my favourite dress! It's basically just a longer version of my favourite shirt though, so you can totally use the pattern you already made!
You're also going to need some stretchknit in what I call "Jedi Beige". It was a little diffcult finding the shade I liked but this was close enough. Too bad it was like $15 a metre or something ridiculous like that. Oh well! For the Force!
I also used a brown t-shirt my mother donated to me a little while ago
Such a cute dress. I really love it
Pin your pieces to the jersey fabric and cut it out
With the front of you dress piece, cut out a little chest piece from the brown jersey. I made it sit just across my bustline but in future I would have made it a few centimetres longer. This will be your little 'undershirt'
I measured down about 10 cm and did a little snip in the fabric, making sure the brown undershirt piece was longer than where the snip was!
Using brown thread and a zigzag stitch, hem the neckline of the undershirt piece
Then using Jedi Beige thread and a zigzag stitch, hem the V-shaped neckline of the dress front.
Okay now we're going to work on the two crossover-wrap pieces. Measure from the shoulders down the front of the dress
Right down to the hem. Mine is 87cm.
Fold each strip in half and stitch along the long end, making tubes Turn it right side out so the raw edge of the seam is on the inside of the tube.
Bunch up the top of the tubes and pin one to each shoulder of the front piece of the dress. Leave a 1cm seam allowance/space on the ooutside of the shoulders [where the sleeves will go]
Make sure the brown undershirt piece is attached underneath, and place the back of the dress on top. The layers should go
Bottom - Brown undershirt
1st Layer - Front of dress
2nd Layer - wrap pieces
Top - back of dress
All the layers should be right sides facing up except for the back of the dress which will be facing down towards th others.
Stitch across the top with a 1cm seam allowance.
Now is a good time to secure the undershirt a little. I pinned the dress to the undershirt at the centre of the V neckline, stitching a little in the seam that was already there to fasten it.
Push the shoulder seam allowance towards the back and stitch across on the back of the dress. I did mine about 1cm from the seam.
Find the centre of the sleeves.
Open up the dress and lie the shoulder seams flat
Pin the centre of the sleeve to the shoulder seam
Pin the rest of the sleeve to the curve of the armhole on the dress. Do the same for the other sleeve and stitch.
Fold up 1 cm of the bottom of the dress and hem
Now we're going to make the little 'belt'. Cut a strip of fabric out of the main colour as slightly short than the width of the front of your dress across the natural waist. I made mine about 20cm wide?
Cut another strip the same length but out of the brown fabric and make it about 6-7cm wide.
Fold the main belt in half, right sides together and sew along the long edge so you have a tube
Do the same to the brown one. In this photo you can see the linty goodness on the fabric :P
You can turn them out the other way but I didn't bother, just ironed them flat so the seam would sit on the inside
Pin the belt to the side of the front where you want it to sit, the brown belt on top of the Jedi beige one.
Lay the back of the dress over the top and stitch from the hem of the sleeve all through the armpit and down the side of the dress. Do the same for the other side

Linked up here!


9 comments
Hahaha love it! Can't wait to make it :)
ReplyDeleteYou make such a hot jedi! Love this dress.
ReplyDeletethis is so adorable! i wish i was a little bit craftier
ReplyDeleteLove this dress Maxi! It's super cute. <3
ReplyDeleteOh, this is so fantastic! I love that it references star wars, but it's flattering! My husband and I are star wars fans, so I really appreciate this tutorial!
ReplyDeleteThanks for linking up!
So cute! I definitely have to make one of these!! Will be wearing by brown boots and leggings with mine!! Can't wait! THANKS!!!
ReplyDeleteSo cute!! Defiantly wearing my boots and leggings with this!!
ReplyDeleteOMG!!! Thanks!!!!
ReplyDeletehahahahaha I love it!!!
ReplyDeleteI love comments!