
I got this large Blink 182 t-shirt on eBay when I realised I did not own one Blink shirt. I felt really bad! Anyway awesomely enough this shirt has a print on the front and on the back so in my eyes that = two shirts! Hurray!

I cut up the back of it for the idea I had in mind, so I still have the front of the shirt left to make something radical out of. You can see a video of me wearing it here.

As you can see I made it into a scoop-neck tank type deal with a shrug-looking section over the top from contrast fabric! It's all joined together and you can pull it on like a normal shirt. The back is just plain.

[Scroll down to the bottom of this post to see something else I made last year with the same version of this Blink 182 shirt! Warning: Contains cute!]
Are you ready for the tutorial?
What you'll need is:
T-shirt you want to operate on
Contrast fabric
Pattern pieces from your favourite shirt! [tutorial how to do that here]

Trace around the front of your shirt pattern, we're going to be making a pattern for the chestpiece.So trace down the centre front, shoulderseam, armhole and sideseam. Mark where the neckline scoops down to.

Draw a new neckline, I made mine like a basic t-shirt. I measured up about 10cm from the original neckline and drew a horizontal line. Add seam allowances to the base and the neckline of the chestpiece.

Get your shirt!

I cut the entire back off the shirt, leaving the sleeves and neckband on the rest of the shirt.

Fold the shirt in half! It might not be exact, but I wanted to make sure the name was perfectly centred so when I folded it half I put the 2 [the last thing on the shirt] underneath the b [the first thing].

As you can see, when I go to put my pattern piece on top, the upper section of the top is wayyy too long for where I want the name to sit [across my chest]

I pinned it on anyway

Make little marks where the top of the shirt comes to on the pattern, making sure to bring it down 1cm for seam allowance! Cut it out.

With some scraps [I used the bottom of the shirt] I pinned the top section of the pattern down and cut it out.

Right-sides together, pin the top of the shirt to the rest of it.

Switch your stitch setting on your machine to zigzag and stitch it. Then top-stitch it!

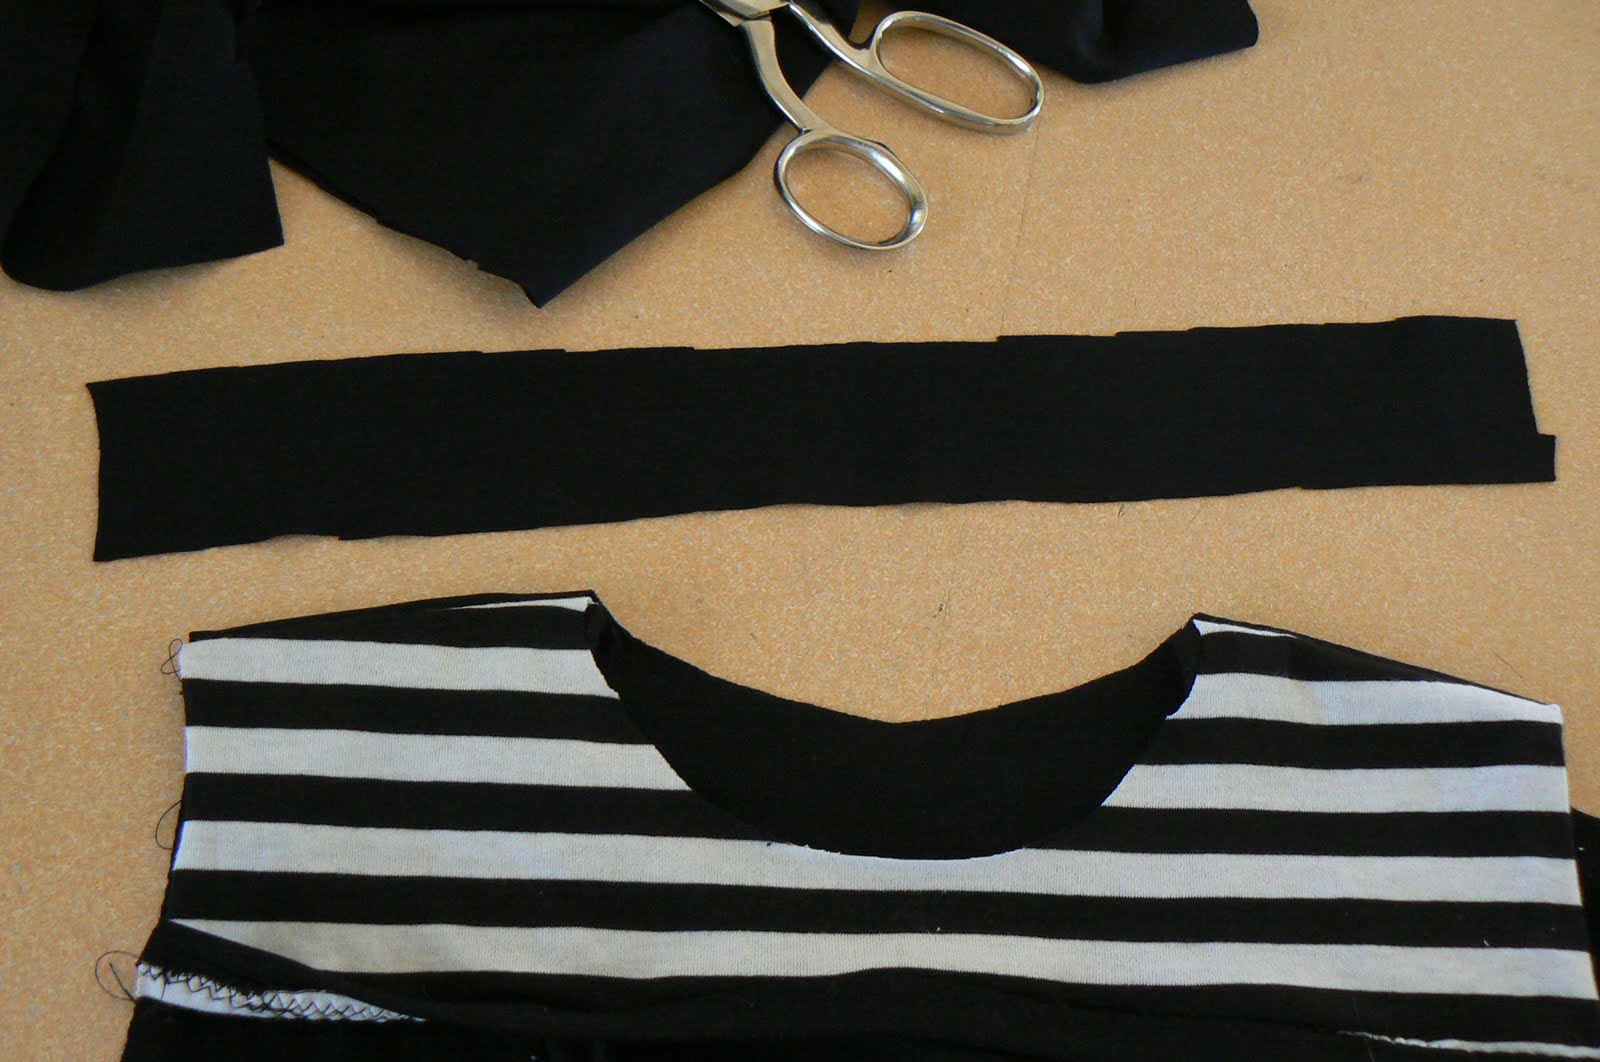
I cut the scoop a bit wider and slightly deeper [still didn't turn out as deep as I wanted it but it's okay!]

Pin the chestipiece to the contrast fabric! I'm using this cute black and white striped fabric.

I didn't want long sleeves so I made them short. Use your sleeve pattern and cutout two sleeves the desired length.

Since my original shirt had print on both sides, I used black knit fabric to cut out the back piece.

Cut a black band about 4-5cm wide and as long as the bottom of your chestpiece

Fold the band in half lengthways and pin it so the fold points to the neck of the chestpiece

Stitch it with your zigzag stitch and topstitch.

Should look like this :)

Cut a band the length of your scoop neck for the front of the shirt and do the same as you just did for the chestpiece. If you cut the band slightly shorter than the required length and stretch it a little as you sew it, it will sit nicely.

Stitch and top-stitch!

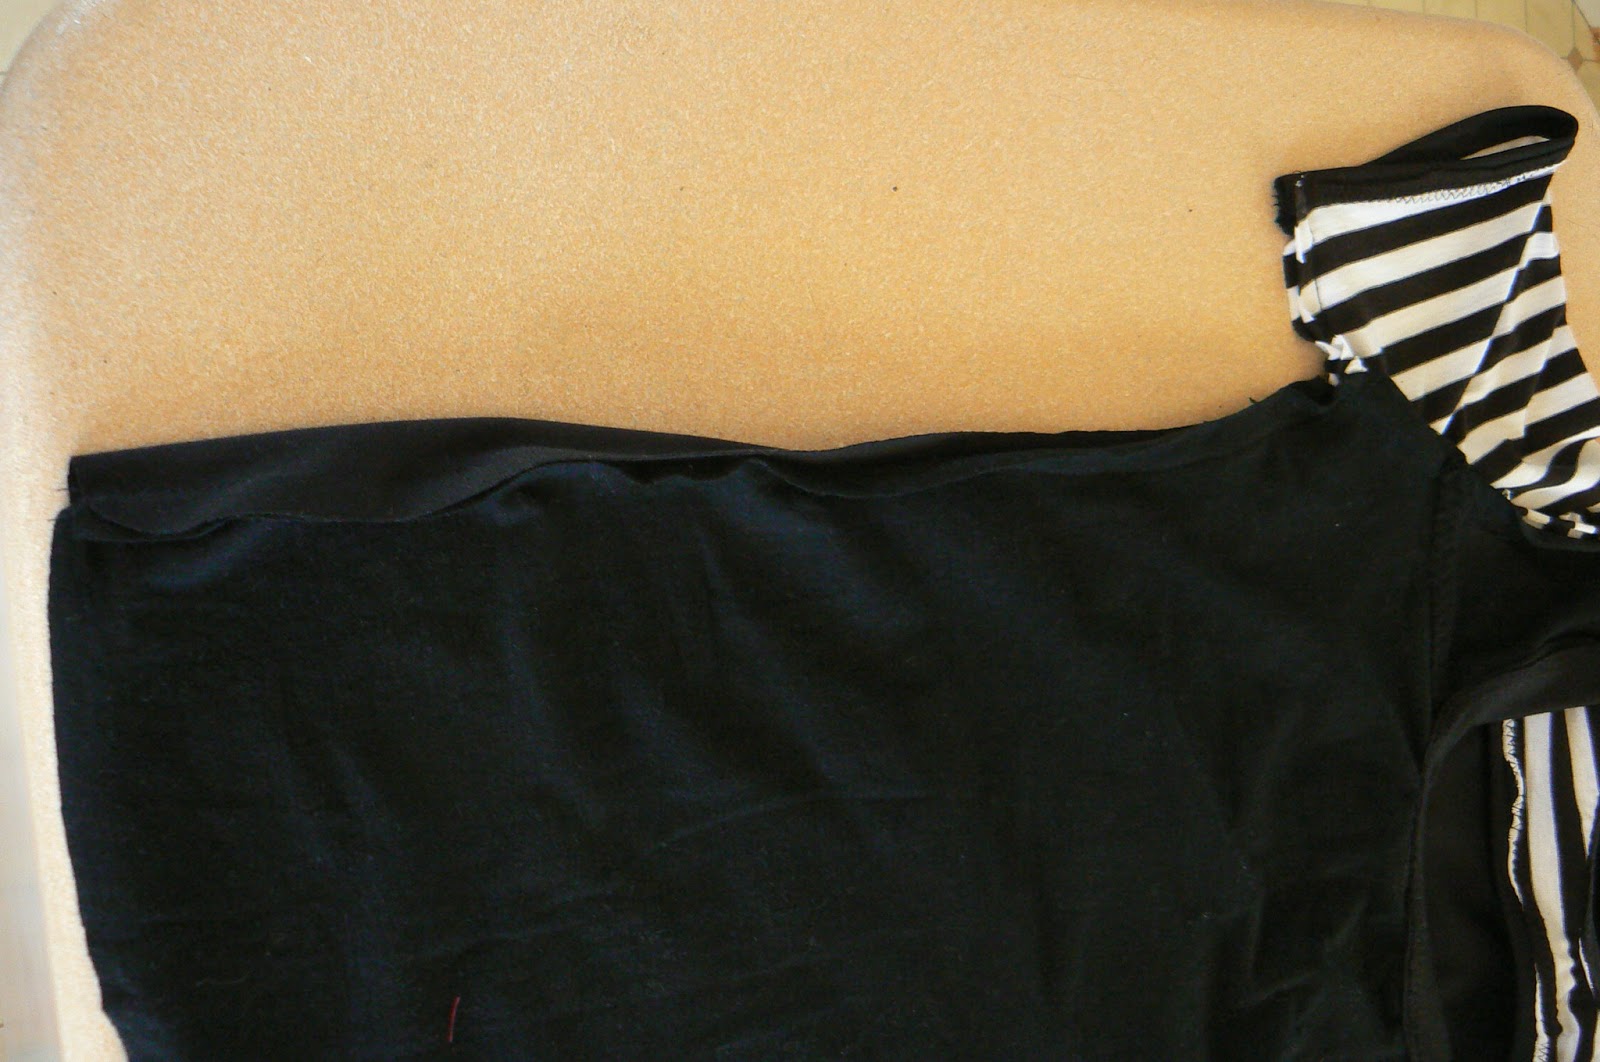
Place the chestpiece over the top of the front of the shirt, matching up the shoulder seams.

Pin the back of the shirt on top of the other pieces, right side down. Stitch across the shoulders

Should look like this so far!

I folded it in half, so what you're seeing is the chestpiece and the back of the shirt. The neckline was a little too small for my liking so I just snipped in a new one. Folding it in half means it'll be symmetrical.
Now you're going to cut a band for the neckline. The same that you did for the scoop on the front and for the bottom of the chestpiece. Again, a slightly smaller [I'm talking like 1cm] band is going to make it sit nice and flat if you stretch it a little when you sew.

Fold the band in half widthways, stitching with a 1cm seam allowance to make it into a ring.

Fold it in half lengthways and pin it around the neck opening of your shirt, the folded part should be pointing away from the opening.

Stitch and top-stitch! [Make sure it's back on zigzag!]

Now we're going to make little cuffs for the sleeves. Basically we're doing bands AGAIN. So do what you've been doing for the bands for everything else, but for the bottoms of the sleeves.

Stitch and topstitch

Find the centre of your sleeve. I cut a tiny little snip in it so I can find it easy. Place the sleeve face down ontop of the shirt, lining the centre snip with the shoulderseams. Pin it. Then pin the edges of the curved part of the sleeves to the edges of the curved part of the shirt. Then pin all the bits inbetween

It will look like this. You may need to stretch the fabrics slightly to make it all fit nicely, this is a great plus for using knit fabrics! Now stitch it!

Make sure you have the chestpiece pinned in the armhole seams! [the first time I did it, one side wasn't it -_-]
Now stitch the sleeve seam all the way down the side seam! I reinforce the armpit point with a few backwards and forwards stitches to make sure it doesn't pop.

Now hem the bottom of it! You can also add a band across the bottom if you like but I was over bands by this point so a simple zigzagged hem was fine. If you have a twin-needle and know how to use it you can also hem it that way. [Don't worry! I'll be doing a twin-needle tute asap!]

Fierce!
Want to see something cute I made last year for a beautiful baby girl? She was the only baby girl in my life for the longest time [okay, all her life until a week ago] and her mama has good taste in bands and style so she commissioned me to hack up a shirt identical to the one I used here for Baby Girl!
 |
| All the! Small things! |
Cute!
And the dress isn't so bad either


 • www.max-california.com")

6 comments
This tute is EPIC. I can't wait to get home to try it out. ARG! I'm going crazy without my sewing stuff!
ReplyDeleteI don't think i've commented on your blog yet...this rules! love that you used stripes. going to try definitely!
ReplyDeletexoxo
Kick ass! I don't think I've quite expressed how awesome I think this recon is. I really need to find my crafty mojo & try this one out.
ReplyDeleteI'm loving the stripeyness x
ReplyDeletei REALLY REALLY love this!
ReplyDeleteHey I just found your blog and thought to stop by and say hi as I am a new follower!!!
ReplyDeleteTake care ;-)
I love comments!