
30 Days of Sundresses: The Nova Dress + free 2T pattern + giveaway
By ari - June 30, 2015
Yes, you're absolutely right. I'm a fake. It's Winter here, and here I am sewing things for Melly Sews' 30 Days of Sundresses when we should be wearing hoodies and jeans and boots. Can you blame me though?
It's alright because I managed to come up with a hella cool dress and Eddie loved it so much it was a battle to put a jumper on her after the photos and to be honest? It wasn't really that cold.

30 Days of Sundresses is an annual event that Melly throws over on her site where you get 30 days chock full of tutorials and free patterns and giveaways for dresses. Not just little girl's dresses, we're talking women's as well! You can enter the giveaway over at Melly Sews Here. This month it's a mystery box of sewing goodness that I know you want your little hands on!

For my little offering I sewed up a fun little dress for Eddie. It took me quite a few versions to get one just right and even as it is the one pictured here has a bit of a gapey neckline. Do not fear! The one in the tutorial that you get a free pattern for is legit!

It's a simple little bodice, with a surprise back...


And the skirt features two layers of ruffles. It's up to you how ruffly you want it and whether you want them contrasting or the same fabric. It falls about mid-thigh, because I love my toddler dresses 1950s-style short! I know that this length is not popular for everyone but it's not difficult to lengthen the skirts!


I've also got some directions on how to make it into a sweet two piece! Come back tomorrow to see the little hack for that.
Ready to get started? Read on!

Throughout this tutorial I will be making a Buzz Lightyear dress. The main fabric is the blue Buzz Lightyear print (thrifted from a doona cover) and the contrast is a yellow cotton.
This pattern is for an adventurous beginner sewist! There is no super tricky techniques, just go slow and make sure things are sewn properly before advancing to the next step!
You will need:
0.75m woven fabric
0.5m contrast fabric
1.2m of bias tape (or make some from your contrast fabric)
Scrap of knit fabric: 45cm x 5cm. This will be for the neckband so make sure it matches!
your regular sewing gear (I used 2 bobbins of thread if you want to make sure you're not halfway done and then realise you're outta bobbin thread!)
free pattern (2T) - the pieces are hand drawn at the moment! I am currently digitalising them ^_^
a note about the pattern: I am NOT (yet) a 'proper' pattern designer. I've been designing my own patterns for years, went to fashion school and had an absolute blast studying pattern-making, but I know I have a lot to learn to expand my skills (my skills are in womenswear, not kids. you'd think sewing for little rectangles would be easier than a woman's curves but not for me lol)! This is a free pattern, tested only by me. If anything is unclear, leave a comment and I will reply! Click on the pictures to make them larger.
Sizing
This isn't a super fitted dress, however with no closures the neckline is big enough to slip on over your babe's head! Here are Edison's measurements which you can compare!
Chest: 53cm (21")
Finished Length: 40cm (16")
Head Circumference: 50cm (19.5")
1. Cut out all your pieces:
1x back on fold from main fabric
1x back on fold from contrast/lining fabric
2x sleeves on fold from main fabric
1x front on fold from main fabric
1x 45cm x 5cm neckband from stretch fabric
2x 90cm x 18cm (35"x7") rectangles (or the width of the fabric 18cm/7" for length) from main fabric for top tier of skirt
2x 90cm x 25cm (35"x10") rectangles (or the width of the fabric 25cm/10" for length) from contrast fabric for lower tier of skirt
30cm of 2.5cm+ wide bias tape (10.5"x1"). This can be either pre-made or purchased. If you have wider that would work great too
2x 27cm x 5cm (10.5"x2") rectangles from contrast fabric (or from bias tape!) for sleeve bands


3. Attach front to back. Right sides together, pin and stitch with a 1cm seam allowance across the shoulder seams. Overlock/serge this seam!

5. Make bias tape triangles. Fold one edge of the bias tape toward the other edge, making a little triangle shape. Pin this to the neckline of your dress where the shoulder seam is. Fold the rest of the bias tape toward the neckline so you have a triangle + pin (see picture!). Cut the excess tape and make another small triangle, overlapping on the first triangle you made. Repeat until you have about five or six triangles. I only did a quarter of the neckline but you can do the entire front, half the front & back or the entire thing. Press & secure with a basting stitch - making sure to stitch through the fabric of the dress and the triangles.


6. Neckband. Create a loop for the neckband by folding the neckband fabric in half and stitching the shorter ends together with a 1cm seam allowance. Open up and fold the neckband in half lengthways. Pin to the neckline of the dress, stretching very slightly. Stitch with a 1cm seam allowance and overlock/serge.


7.Attach bands to sleeves. Place arm bands right sides together against lower edge of sleeve. Stitch with a 1cm seam allowance.


8. Attach Sleeves. Find the center of the sleeve curve and pin it to the shoulder seam. Pin the rest of the sleeve curve to the arm curve and stitch with a 1cm seam allowance. Overlock/serge.


9. Sideseams. Pin the sideseams from the bottom of the bodice right through the sleeves to the sleeve hems. Make sure the armpit sections match up! Stitch with a 1cm seam allowance and overlock/serge.


11. Hem. Overlock/serge the lower edge of both loops. Fold up 1cm and press. Stitch.


12. Gather. Turn you stitch length to the longest it will go (mine is 5) and the top thread tension to the tightest (9). Carefully stitch along the top of both your skirts, this will create a gather. Make sure you have enough of a 'tail' at the front and back of each stitch line. Do NOT anchor your stitches at the beginning & end (stitch forward and back). Don't do that.
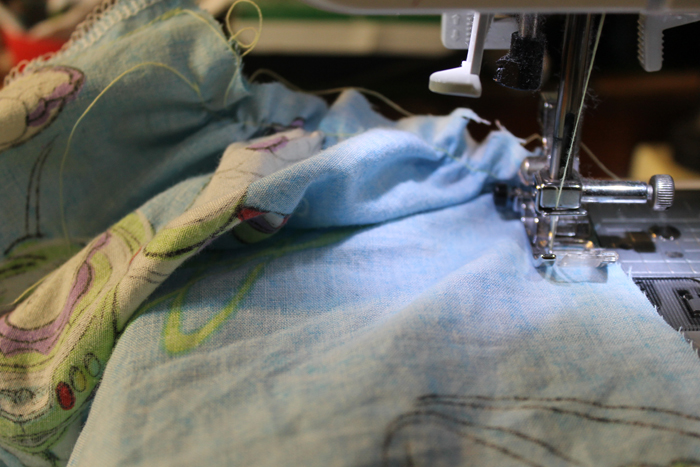

Once you've gathered your skirts, make sure to switch your stitch settings back to the right stitch length & tension!


and you're done!


You should go check out my partner in crime in everything's blog too because we both landed the same day for the 30 sundresses party! Make sure you come back tomorrow to get the instructions on how to make the Nova Dress into the Atom Two-Piece!
If you sew one up, please let me know. I would love to see! Hashtag your creations on insta with #thenovadress
It's alright because I managed to come up with a hella cool dress and Eddie loved it so much it was a battle to put a jumper on her after the photos and to be honest? It wasn't really that cold.
30 Days of Sundresses is an annual event that Melly throws over on her site where you get 30 days chock full of tutorials and free patterns and giveaways for dresses. Not just little girl's dresses, we're talking women's as well! You can enter the giveaway over at Melly Sews Here. This month it's a mystery box of sewing goodness that I know you want your little hands on!
For my little offering I sewed up a fun little dress for Eddie. It took me quite a few versions to get one just right and even as it is the one pictured here has a bit of a gapey neckline. Do not fear! The one in the tutorial that you get a free pattern for is legit!
It's a simple little bodice, with a surprise back...
You can decide which way up you want the triangle...
The neckline is made of knit and without any closures to this dress it slips easily over your babe's clever head. It features some triangles made from bias tape!
And the skirt features two layers of ruffles. It's up to you how ruffly you want it and whether you want them contrasting or the same fabric. It falls about mid-thigh, because I love my toddler dresses 1950s-style short! I know that this length is not popular for everyone but it's not difficult to lengthen the skirts!
I've also got some directions on how to make it into a sweet two piece! Come back tomorrow to see the little hack for that.
Ready to get started? Read on!
Throughout this tutorial I will be making a Buzz Lightyear dress. The main fabric is the blue Buzz Lightyear print (thrifted from a doona cover) and the contrast is a yellow cotton.
This pattern is for an adventurous beginner sewist! There is no super tricky techniques, just go slow and make sure things are sewn properly before advancing to the next step!
You will need:
0.75m woven fabric
0.5m contrast fabric
1.2m of bias tape (or make some from your contrast fabric)
Scrap of knit fabric: 45cm x 5cm. This will be for the neckband so make sure it matches!
your regular sewing gear (I used 2 bobbins of thread if you want to make sure you're not halfway done and then realise you're outta bobbin thread!)
free pattern (2T) - the pieces are hand drawn at the moment! I am currently digitalising them ^_^
a note about the pattern: I am NOT (yet) a 'proper' pattern designer. I've been designing my own patterns for years, went to fashion school and had an absolute blast studying pattern-making, but I know I have a lot to learn to expand my skills (my skills are in womenswear, not kids. you'd think sewing for little rectangles would be easier than a woman's curves but not for me lol)! This is a free pattern, tested only by me. If anything is unclear, leave a comment and I will reply! Click on the pictures to make them larger.
Sizing
This isn't a super fitted dress, however with no closures the neckline is big enough to slip on over your babe's head! Here are Edison's measurements which you can compare!
Chest: 53cm (21")
Finished Length: 40cm (16")
Head Circumference: 50cm (19.5")
1. Cut out all your pieces:
1x back on fold from main fabric
1x back on fold from contrast/lining fabric
2x sleeves on fold from main fabric
1x front on fold from main fabric
1x 45cm x 5cm neckband from stretch fabric
2x 90cm x 18cm (35"x7") rectangles (or the width of the fabric 18cm/7" for length) from main fabric for top tier of skirt
2x 90cm x 25cm (35"x10") rectangles (or the width of the fabric 25cm/10" for length) from contrast fabric for lower tier of skirt
30cm of 2.5cm+ wide bias tape (10.5"x1"). This can be either pre-made or purchased. If you have wider that would work great too
2x 27cm x 5cm (10.5"x2") rectangles from contrast fabric (or from bias tape!) for sleeve bands
Bodice
2. Stitch Back Feature. Place backs right sides together. Pin triangle sides together and stitch with a 1cm seam allowance. Use a smaller stitch length! Snip corners and mitre edges. Pull the lining through the triangle so the wrong sides are together and press. If you have any weird little tucks at the triangle corners then you'll need to snip the corners a bit closer.3. Attach front to back. Right sides together, pin and stitch with a 1cm seam allowance across the shoulder seams. Overlock/serge this seam!
5. Make bias tape triangles. Fold one edge of the bias tape toward the other edge, making a little triangle shape. Pin this to the neckline of your dress where the shoulder seam is. Fold the rest of the bias tape toward the neckline so you have a triangle + pin (see picture!). Cut the excess tape and make another small triangle, overlapping on the first triangle you made. Repeat until you have about five or six triangles. I only did a quarter of the neckline but you can do the entire front, half the front & back or the entire thing. Press & secure with a basting stitch - making sure to stitch through the fabric of the dress and the triangles.
6. Neckband. Create a loop for the neckband by folding the neckband fabric in half and stitching the shorter ends together with a 1cm seam allowance. Open up and fold the neckband in half lengthways. Pin to the neckline of the dress, stretching very slightly. Stitch with a 1cm seam allowance and overlock/serge.
7.Attach bands to sleeves. Place arm bands right sides together against lower edge of sleeve. Stitch with a 1cm seam allowance.
8. Attach Sleeves. Find the center of the sleeve curve and pin it to the shoulder seam. Pin the rest of the sleeve curve to the arm curve and stitch with a 1cm seam allowance. Overlock/serge.
9. Sideseams. Pin the sideseams from the bottom of the bodice right through the sleeves to the sleeve hems. Make sure the armpit sections match up! Stitch with a 1cm seam allowance and overlock/serge.
Skirt
10. Sideseams. With right sides together, sew short edges of skirt rectangles. You will have two loops, one of the top tier from the main fabric and one of the lower tier from the contrast fabric.11. Hem. Overlock/serge the lower edge of both loops. Fold up 1cm and press. Stitch.
12. Gather. Turn you stitch length to the longest it will go (mine is 5) and the top thread tension to the tightest (9). Carefully stitch along the top of both your skirts, this will create a gather. Make sure you have enough of a 'tail' at the front and back of each stitch line. Do NOT anchor your stitches at the beginning & end (stitch forward and back). Don't do that.
Final
13. Attach skirts to bodice. Carefully pin the sideseams of the top skirt to the sideseam of the bodice, right sides together (basically the bodice will be inside the skirt). Now adjust the skirt fullness by tugging on your 'tails'. Be careful! Pin the skirt to the bodice evenly and stitch with a 1cm seam allowance. Now do the same with the underskirt/lower tier. Place the dress inside the lower tier and adjust the fullness by tugging on the tails (see picture!). Pin and stitch with a 1cm seam allowance (maybe just a smidge bigger). Then overlock/serge. |
| 'tails' |
and you're done!
"Gnarly"
You should go check out my partner in crime in everything's blog too because we both landed the same day for the 30 sundresses party! Make sure you come back tomorrow to get the instructions on how to make the Nova Dress into the Atom Two-Piece!
If you sew one up, please let me know. I would love to see! Hashtag your creations on insta with #thenovadress


 • www.max-california.com")

14 comments
Aw, yes!! This is such a cute and cool dress! Thanks for the pattern and tutorial - will be making this for my girl :)
ReplyDeletethank you so much! Can't wait to see it!
DeleteI love those little bias details!
ReplyDeletethank you! they're easy to miss but I think that's the fun of it!
DeleteI am dying over her adorable little legs! I love the 50's length too. So fun!
ReplyDeleteomg i know her knees are so delicious!! thanks so much <3
DeleteShe looks absolutely adorable. The dress is amazing.
ReplyDeleteThis is the cutest and coolest dress ever. Oxymoron, maybe... but seriously, love it!!!
ReplyDeleteLove this one, too. Plus I'm totally jealous for all the fun walls that you find for pictures. No way to find these in my part of good old Germany...
ReplyDeleteHello
ReplyDeleteWhen I saw your name I thought you got it from the JS film 8MM - one of my favourite films.
I hope you don't mind me saying but your daughter is freaking adorable! The photo of her holding the box of fries and her eating one just shouts ATTITUDE!!!!! No - it SCREAMS it. She is such a cool kid.
From
Cee Jay/Leigh on Sea, Essex, England, Britain
WOAH sorry for my INCREDIBLY late reply but thank you so very much!! she is still just as fierce!
Deletesuch a very cool pattern! I would love to get started but I seem to keep missing the link to the actual pattern when I read this tutorial... sorry if it's just me needing to get some better glasses
ReplyDeleteOh thank the relevant deity I found your blog! I adore this dress. You had me at the number of bobbins you need (pet hate). Do you think this could be turned into a grown up version fairly easily? *off to explore site
ReplyDeleteThis comment has been removed by a blog administrator.
ReplyDeleteI love comments!