

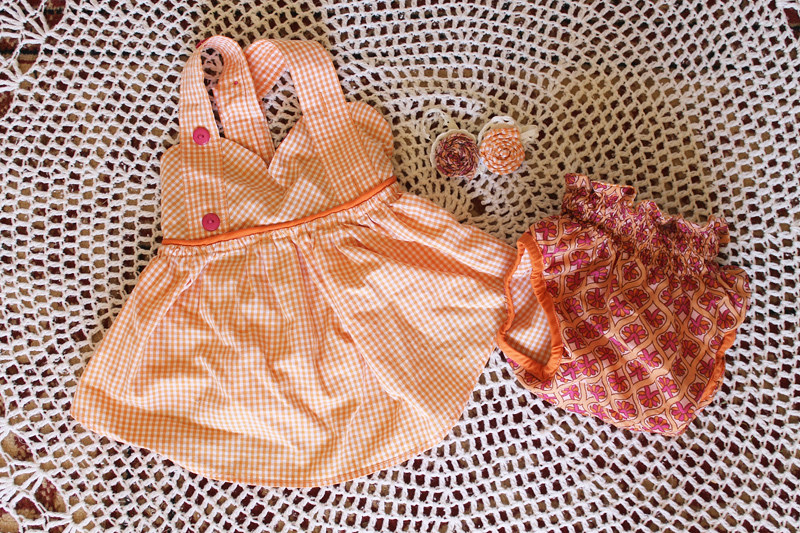
This week's Project Run & Play challenge was to refashion a Men's Shirt! Well I made two outfits, and here is the tutorial for Edison's dress!
For this dress, to fit a size 6 month old {it also fitted Amelia, who is 18 months, as a cute shirt} you will need:
the lower half of a men's shirt,
some shirring elastic,
some buttons if you want to switch them out,
some piping {DIYed or bought},
There are some tutorials I have linked to at the bottom of this post that may help you with shirring, making your own piping and DIY bias binding!

Click the 'Read More' link below for the full tutorial and downloadable pattern piece
You can download the bodice pattern piece here. It is for a size 6 month baby, but could fit up to 18months if worn as a little tunic shirt!

First we are going to cut off the placket. The lower portion of the placket becomes the straps. For Edison's, the placket length I needed was about 40cm. Measure over one of your babe's shoulders and down her back to simulate the Y-shape to see how much you will need, using the pictures above as a guide.

When cutting out the placket, make sure you have 1cm on the side of the buttonhole piece and 1cm on the side of the buttoned piece.

Fold the shirt in half, matching up the sideseams. Regardless of how big your shirt is, we are going to use the entire width as the skirt. If you have a huge men's shirt, you're going to have a lovely full skirt! If you are using a slender-fit men's shirt then you will still have a fullish skirt, since we're turning men's clothing into baby clothing!

The hem of the shirt becomes the hem of the skirt, so measure up from the highest part of the shirt. Mine was about 18cm. Cut straight across.

Now I liked having the bodice of the dress stand out a little bit, so I cut it with the checks going crossways instead of up & down. This will work for striped fabrics too. I folded the front of the shirt up, making a 45 degree angle and cutting out one front of the bodice. If you want to line it with the same fabric then cut out another one as well {that one doesn't have to be on the cross-grain}

I cut my lining fabric out of the purple lotus blossom fabric that I was using in the shirt dress, to tie the looks together a little extra. You can use whatever you like.

Now stitch across the top of the bodice, leaving the bottom straight edge open. Trim your seam allowance close to the seam {be careful!} to get rid of most of the bulk. Turn the bodice right way out and press it neatly.

Get your placket. We are going to fold this under 0.5cm and then under 0.5cm again and stitch the entire length.

It will look like this

Cut off the hem part of the placket {this was the bottom of the shirt, but it will add too much bulk on this dress}

Pin the plackets to the front of the bodice, buttons on one side & button holes on the other. As you can see in this photo above, I didn't switch the original buttons out yet. I did once the dress was complete, so it's up to you what you want to do. I really love the pop of colour the purple buttons bring!
 Now this part is a bit tricky, it's the Y-join at the back of the dress. Now you can just button up the back and leave the parts that go over the shoulders unbuttoned, but it sits a bit strange. So we are going to do a bit of a dart at the back on one of the straps so it sits nicer.
First of all figure out where you will have the Y-join. I then folded over the placket with the buttonholes and placed a pin at an angle, is that a 30 degree angle? Anyway, place a pin across at an angle and then unfold it so you can see how it will sit.

Once you think you have the angle right, it is a bit fiddly I know but once you have a play it is easier, stitch across where you pinned it. Press it flat and you have a dart that made an angle!

Now button up the placket up the back to the join. I didn't realise until i had finished the dress but I could not get it over Edison's head! SO, I added another buttonhole and button at the Y-join.

Here are various angles of what you should have:


Pin your plackets together and stitch up the sides, up over the shoulders and down the straps over the bodice. It's pretty fun, just make sure you have every edge stitched on the outside of the Y and the inside of the Y.

Now gather the front of the skirt. In the picture above you can see I sewed the skirt together into a loop. Better do that too. I gather the 'cheating' way, here is a link to two ways you could gather.

Now pin your bodice to the skirt, the bodice should overlap your sideseams about a cm, it folds around like that.

Stitch & overlock.

The rest of the skirt you are going to want to fold over a 1 cm hem at the top and stitch

Now is the shirring part. Every machine does shirring a bit differently, and I found I had to use an amalgamation of a few kinds of winding my bobbin to get my shirring right. I almost gave up when I first learned to shirr, but don't give up! Because once you have it figured you are going to love it & you are going to be so proud of yourself!
You will need some shirring elastic, which comes in a little spool like thread but it's think elastic. I hand wind my bobbin with the elastic, stretching a little as I do it. Some tutorials tell you NOT to stretch it, or wind it with their machines. This is okay, but neither techniques worked for machine. Once my bobbin is full-ish, I pop it into my machine and sew as usual. There are two shirring tutorials at the bottom of this post, this one helped me the most by Ruffles and Stuff.

Aw hey what?! Why did I cut my shirring off? Well as you can see in the photo before this one, once shirred it was lovely, but didn't bring the back of the shirt in enough. So I folded it in half along the back centre seam I did and cut off a good 10cm in total. Then I stitched up a new centre back seam and overlocked it so it would all stay put. This way it sits snug on Eddie's little back.
Make sure you try the dress on or go by your measurements of the child before you hack it up!

Now all that is left is to attach the back of the Y-strap to the centre back of the dress. Pin & stitch and you are done!

I love how the orange of the dress makes it look like she has ginger hair!
Here's some helpful resources that may help you with this tutorial:
Make your own custom piping
Piping tutorial
Shirring tutorial
Another Shirring tutorial {as mentioned above, it all really depends on your machine. Try a few different ways, don't give up! I almost gave up but persisted and now I want to shir everything!}
Printable Bias Tape Maker {in 2 sizes}
Gathering: the roper way & the cheating way {I use the cheating way, every time}
Check in a few days for the matching tutorial for Amelia's Wanderlust shirt over at Project Run & Play. After the competition I will be making tutorials for all of my looks also!
 • www.max-california.com")


 • www.max-california.com")

7 comments
So sweet! I'm sad my girls are all big now (HA - my youngest girl is 3) but I have 4 neighbors all with baby girls or about to have one! :D
ReplyDeleteNawww! That's adorable! Thanks for sharing xx
ReplyDeletesuch a cute outfit!! love the colors too.
ReplyDeletelove, x
blog | twitter
Very well-deserved win! Thank you for sharing your tutorial :)
ReplyDeleteSo glad you made a tutorial for this! I've loved this look from day one ;-)
ReplyDeleteThank you for the tutorial! I used it to make my daughter a dress out of dad's work shirt and it turned out so cute, I wish it would let me post pics!
ReplyDeleteThank you for the tutorial! I used it to make my daughter a dress from dad's work shirt and it turned out so cute! I wish it would let me share pics!
ReplyDeleteI love comments!