A few weeks ago, I decided that my Monster and I would have a Peter Pan day! Things didn't go as planned as some exciting things concerning the baby in my belly were happening which included several blood tests and doctor visits, but what DID happen was that Monster got to watch Peter Pan, and he got to dress as Peter Pan!
He loved it. He wore his little costume all day, and then a few days later when I took the boot covers off his boots he got anxious when he couldn't find them!
I winged the boot covers completely, and I cannot believe how awesome they turned out! I shall definitely be making a tutorial and pattern for them!
I used brown fleece and sewed elastic underneath to keep them on his gumboots. I added fold over cuffs to make them more Peter Pannish, and a little point on the toe!
His hat his made from green felt, and I used the shapes Ashley showed in her Peter Pan Costume at Make It and Love It. I found some red feathers in a bag {I think they were left overs from his Cowboy + Indian Party?} which cracked me up that they just happened to be there! I glued one inside the brim of the hat
 |
| Think Happy Thoughts |
His shirt and shorts are reconstructed from a green zip-up jacket mum gave me to reconstruct, I kept the original collar and the zip, melting it at the bottom so it would unzip completely when I had to cut it shorter.
The shorts are just basic little shorts I made from the go-to pants pattern for my skinny tot - Dana's Kids Pants.
I was making a Tinkerbell costume for myself but I never got to finish it. My little Peter Pan really enjoyed himself, but I want to try again to make a special adventurous day just for him in Neverland.

 |
| Toot toot chugga chugga Big Red Car |
One night on facebook my friend had as her status that someone was trying to sell 4 tickets to the Wiggles concert the next day. I jumped on my phone and sorted it out with my friend Sophie and the next day two mamas and two little boys were headed to the concert!
Monster has one Wiggles branded item, his precious blue gumboots he is so fond of wearing {I'm sure you've seen him in them a lot throughout this blog}. His best friend Genius also has one Wiggles branded item, a pair of little jocks.
To rectify the situation, in less than two hours I had whipped up two t-shirts!
I used scraps of fabric I already had, luckily in Anthony blue and Sam yellow! Trying to think of a quick and easy design, I jumped onto the Wiggles website and found their colouring pages! Scrolling down I saw EXACTLY what I wanted, Masks for the kids to print, colour and cut out! These turned into Freezer Paper stencils!
 |
| Sam the Yellow Wiggle |
 |
| Anthony the Blue Wiggle! |
Sophie bought the boys some toy dog bones to give to Wags the Dog and a bunch of fake roses each to give to Dorothy. When Monster and Genius gave the bones to Wags, the ringmaster sung a song about them with their names in it! It was so cute, the boys of course didn't care.
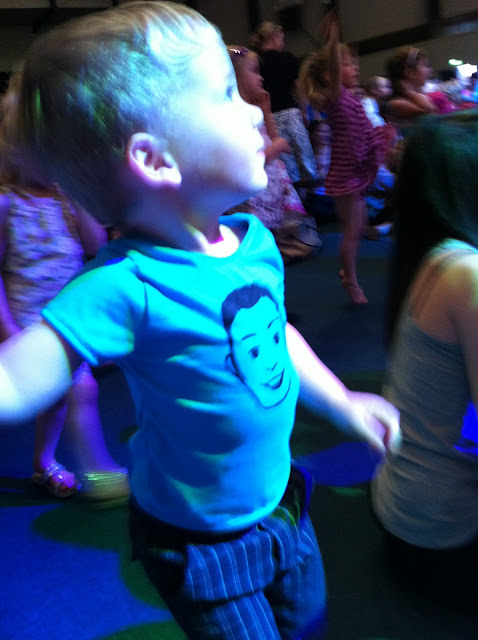
Monster had THE GREATEST TIME EVER dancing. I couldn't get a clear photo of him.
Pre-Wiggles cuddles. These two are bros.
Soph giving them their supplies!
Genius got his photo taken with Sam. It was so cute. Sam was showing Genius how they were wearing the same shirts. ADORABLE. In the big finale at the end he came over to the corner of the stage and was showing the same shirt thing again.
Doing tricks
It was like a Toddler Rave.
He knew how to do Heads, Shoulders, Knees and Toes. No idea how but yey Monster!
Break-Dancing
Something exciting happening apaprently
"Mum no photos! Their playing my song!"
Fistfulls of Confetti
Bros for Life
They had a huge day, minimal naps occured, and then they found a bee
Best Day Ever.

As usual with the introduction of most of my posts lately, the original idea for this was found on Pinterest. Since our baby friend Bug's naming day was Ladybug themed, Monster and I got into the spirit of things!
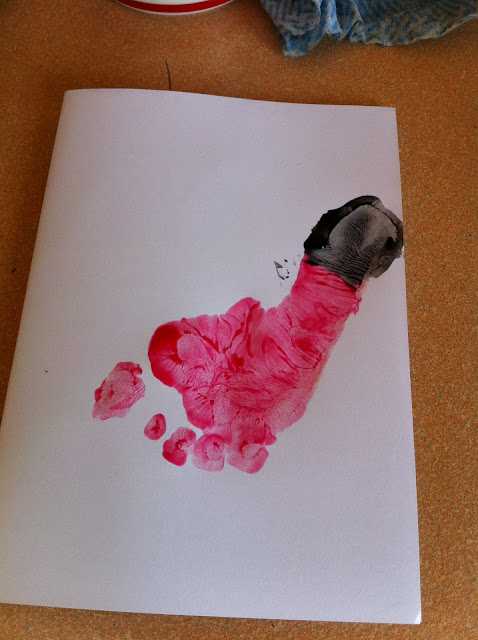
I painted the sole of his foot red, he's not even ticklish! And the heel of his foot I painted black. Then I got him to lean on me as he stood on one leg, using his painted foot as a stamp. He thought it was HILARIOUS.
well look...
That is a messed up Ladybug!
While we waited for them to dry, I taught Monster what a dot was and how to make one. Dot Dot Dot! Still fun!
When the bug feet prints were dry, I drew on some spots, eyes and antlers with a permanent marker.
Remember guys, if you want a Pinterest invite just pop your email in the comments below!

I bought the Aldi cookbook a few months ago and can I just say I LOVE IT. Best recipes, I know that every ingredient is at my local Aldi store and Tim gets excited that I actually feel like cooking.
A week ago I made these. Tim was out of town so it was tea for two with me and my date, my little Monster. He helped me cook, and he tried to learn how to use a knife... upside down.
Ingredients {Serves 5}
432g can pineapple slices in juice
1 tablespoon olive oil
500g ham steaks
1/4 cup white vinegar
1/2 cup brown sugar
1 teaspoon wholegrain mustard
Instructions

A week ago I made these. Tim was out of town so it was tea for two with me and my date, my little Monster. He helped me cook, and he tried to learn how to use a knife... upside down.
Sweet Ham Steaks
Ingredients {Serves 5}
432g can pineapple slices in juice
1 tablespoon olive oil
500g ham steaks
1/4 cup white vinegar
1/2 cup brown sugar
1 teaspoon wholegrain mustard
Instructions
- Drain the pineapple slices with a sieve over a bowl and save 1/4 cup of the juice
- Heat the oil in the pan to a medium high heat and add the ham steaks
- Cook for 2 minutes on each side and set to the side
- Add the pineapple rings to the pan and cook for 2 minutes on each side.
- Add the white vinegar, brown sugar and wholegrain mustard to the pan. Bring the ham steaks back into the pan party
- Bring to the boil, then reduce the heat and simmer, stirring for 2 minutes.
- Allow to cool a little, the sauce will thicken
- Eat up yo!

That LOVE one? Hilarious story. See that strange shaped 'O'? It's a larger can than I'd used before, so I filled it with water, whacked it in the freezer. Couple of hours later I pull it out, it's all iced, sweet! I decide to do the design low down, since that's where the candle is, and I start hammering away.
Water starts seeping out of the holes rather rapidly, and I think, "WOAH. It is defrosting REALLY quickly." I tilt it up so it is standing up and all this water GUSHES out of the L and the O. Th top of the water was frozen, but underneath it was still water!
I quickly wrapped it in a plastic bag and shoved it back in the freezer. A few days later I checked on it and it has this giant ice ring around the base. Hilarious.
Also I updated the original post with step-by-step photos so it is a proper tutorial now!

I bought a huge canvas easy enough, but do you have any idea how hard it is to find crayons in more than a pack of 12 around here?
So ridiculous!
eBay to the rescue! I bought a 64 pack for $9 including shipping. Ah yeh.
 |
| My lovely assistant Tim :) |
 |
| Distracting Vince by posing with the Hot Glue Gun |
We laid the crayons out in a line, glueing them down with Liquid Nails. I didn't trust the hot glue wouldn't melt during the next stage, better safe than sorry!
We let it dry over night in the spare room, far away from little inquisitive Monster fingers {He has attempted ONCE to remove the crayons from the canvas}
The next day we attacked it with the hairdryer!
It took about 20 minutes? Tim and I took it in turns, although Tim's shifts were longer than mine! He really, REALLY enjoyed himself with this project! {As I mentioned earlier, the whole Pinterest thing has made him all excited about DIYing our home}
We hit the tips of the crayons to make them start running, then Tim discovered if you hit the middles and ends big chunks would suddenly glob out {that is totally a technical term I swear}.

I really love the texture!
 |
| This photo makes me hungry |
Because we are beautiful + unique snowflakes, Tim + I decided to flip the canvas so instead of the crayons looking like they were running down the canvas, it looks like they are exploding!
{Linking up to Creative Me Mondays at The Southern Institute}


