
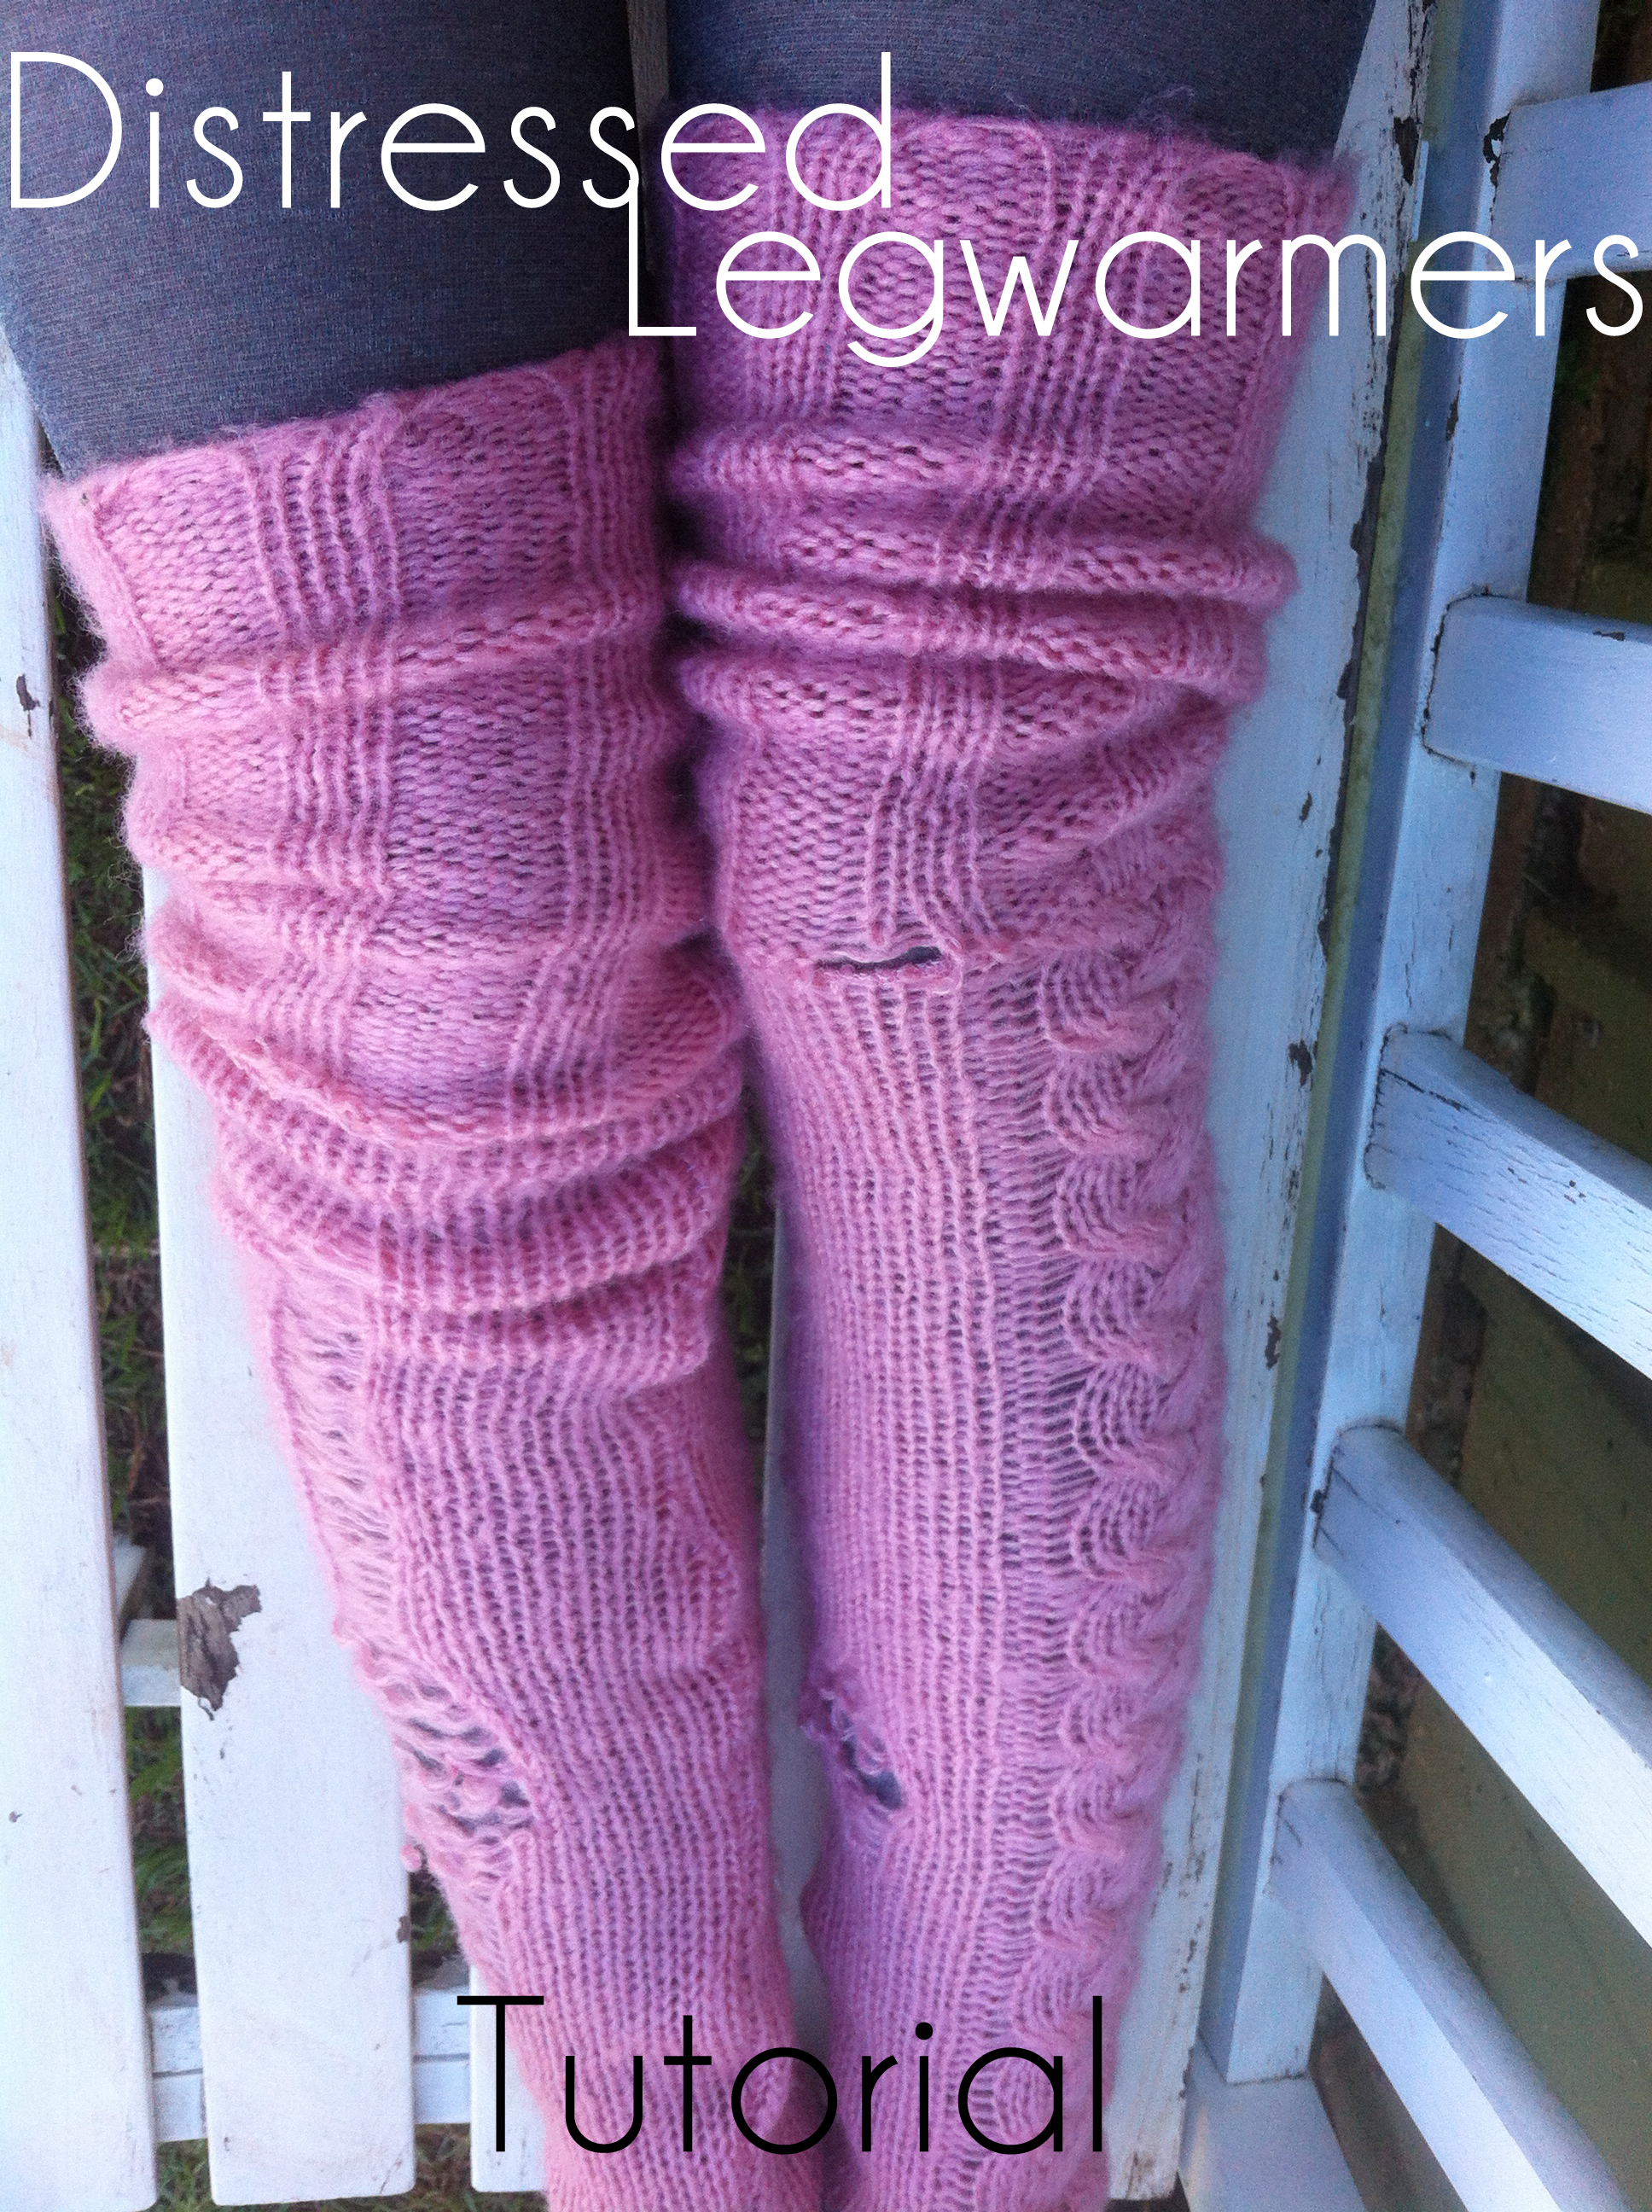
Legwarmers.
I know right? Ordinarily I would be like "Hail No!" BUT, this winter, thigh-high socks, cool tights and boots have been my staple. And leggings. And you know what, with boots, legwarmers look just like socks!
I was rummaging through 13 bags of clothes I'm trying to donate to the op shop, but they just don't seem to leave my studio at all, and I found this hilarious dusky pink cowl-necked poncho. I have no before photo and I'm so sorry but I just started cutting before I thought it might actually turn out into something cool! The top of the legwarmers is actually the cowl neck, and the cable knit down one side of one legwarmer was down the front of the poncho. Then it had like all these tassels around the bottom. Trust me, it was hilarious. I don't even know who it belonged to, it just turned up in my studio somehow. Sorry if someone reading this actually owned it, but it's far too late now.

Anyway I was actually trying to look for a black sweater to reconstruct but this was found instead and then I decided I would use it to make leg warmers.
Inspired by these, which I would totally buy in a heartbeat {if they weren't $120} I decided a bit of DIY was in order. Next time I'll use a finer knit, and not pink, and make them a bit looser.

These legwarmers are so easy to make! Click the link below to read the tutorial!

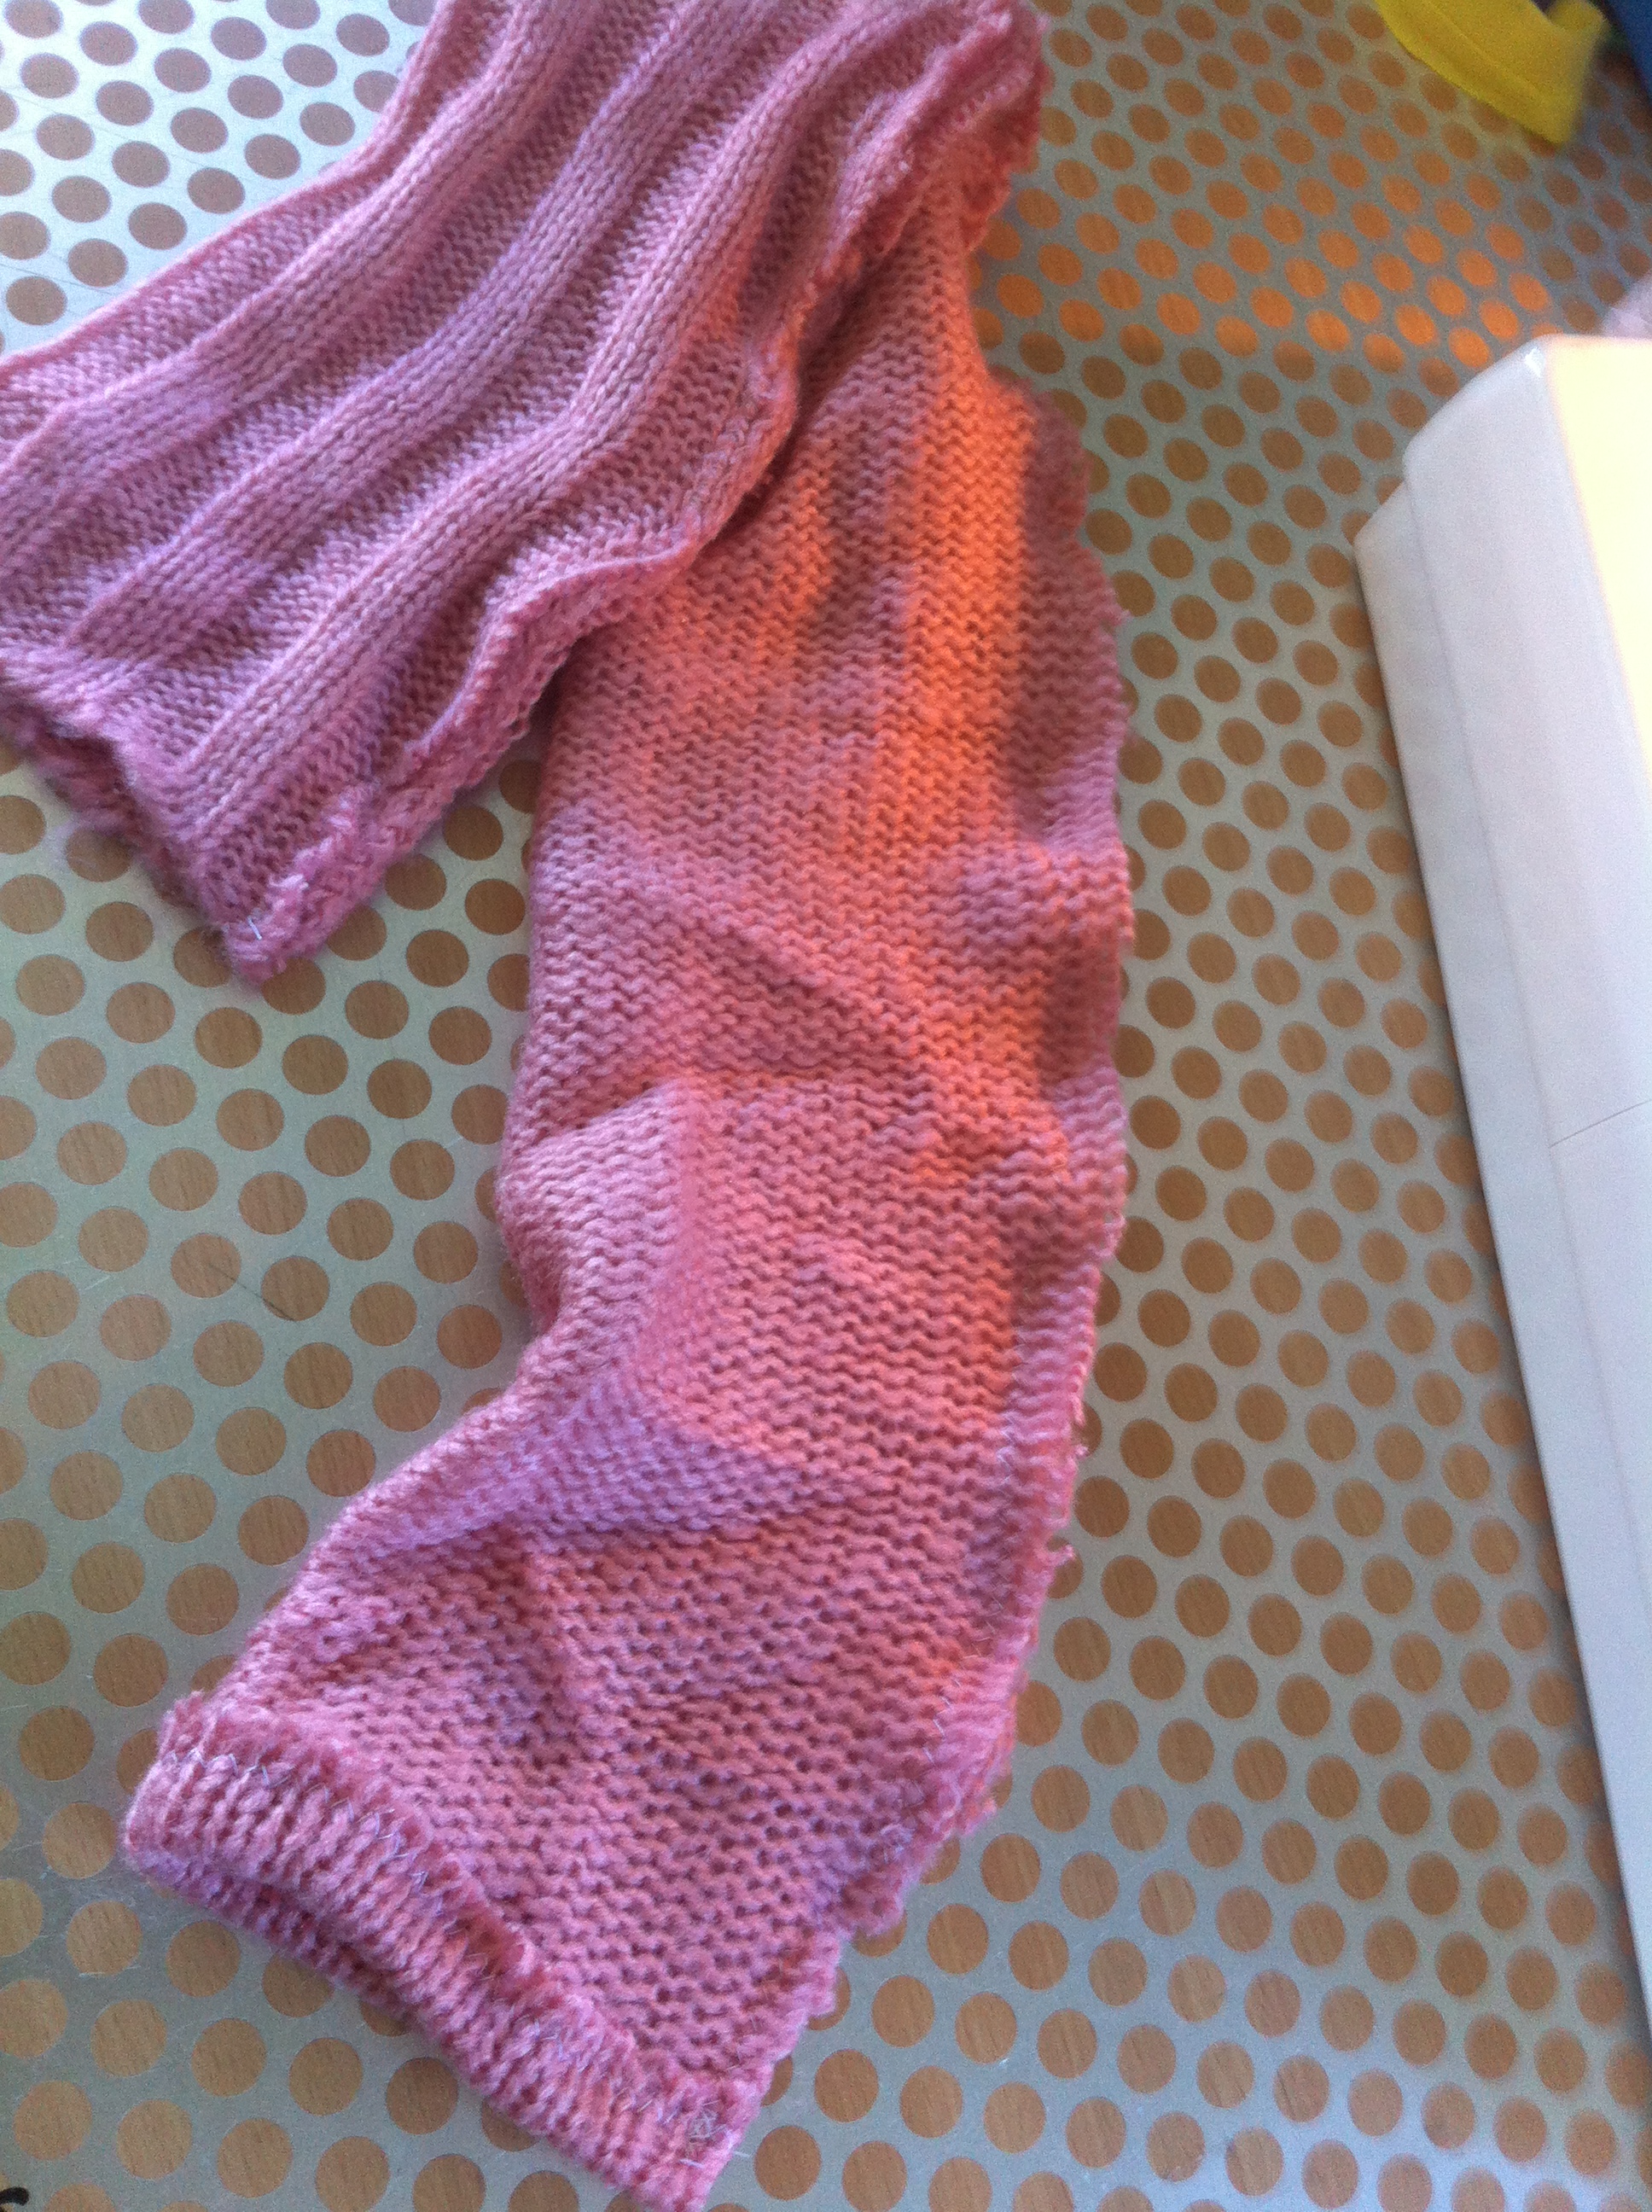
First I cut out two rectangles from the poncho. You can use a sweater, anything knitted! I just eyeballed it, because I was just experimenting, but they turned out a little tighter than I would like them {still comfy!}. Measure around your thigh and your calf muscle then add one cm on each side for seam allowance.
I used the cowl neck as the top of my legwarmer, if you're using a sweater, or the sleeves of a sweater, make the top of your legwarmer from the hem of the sweater, so the hard work is already done for you.

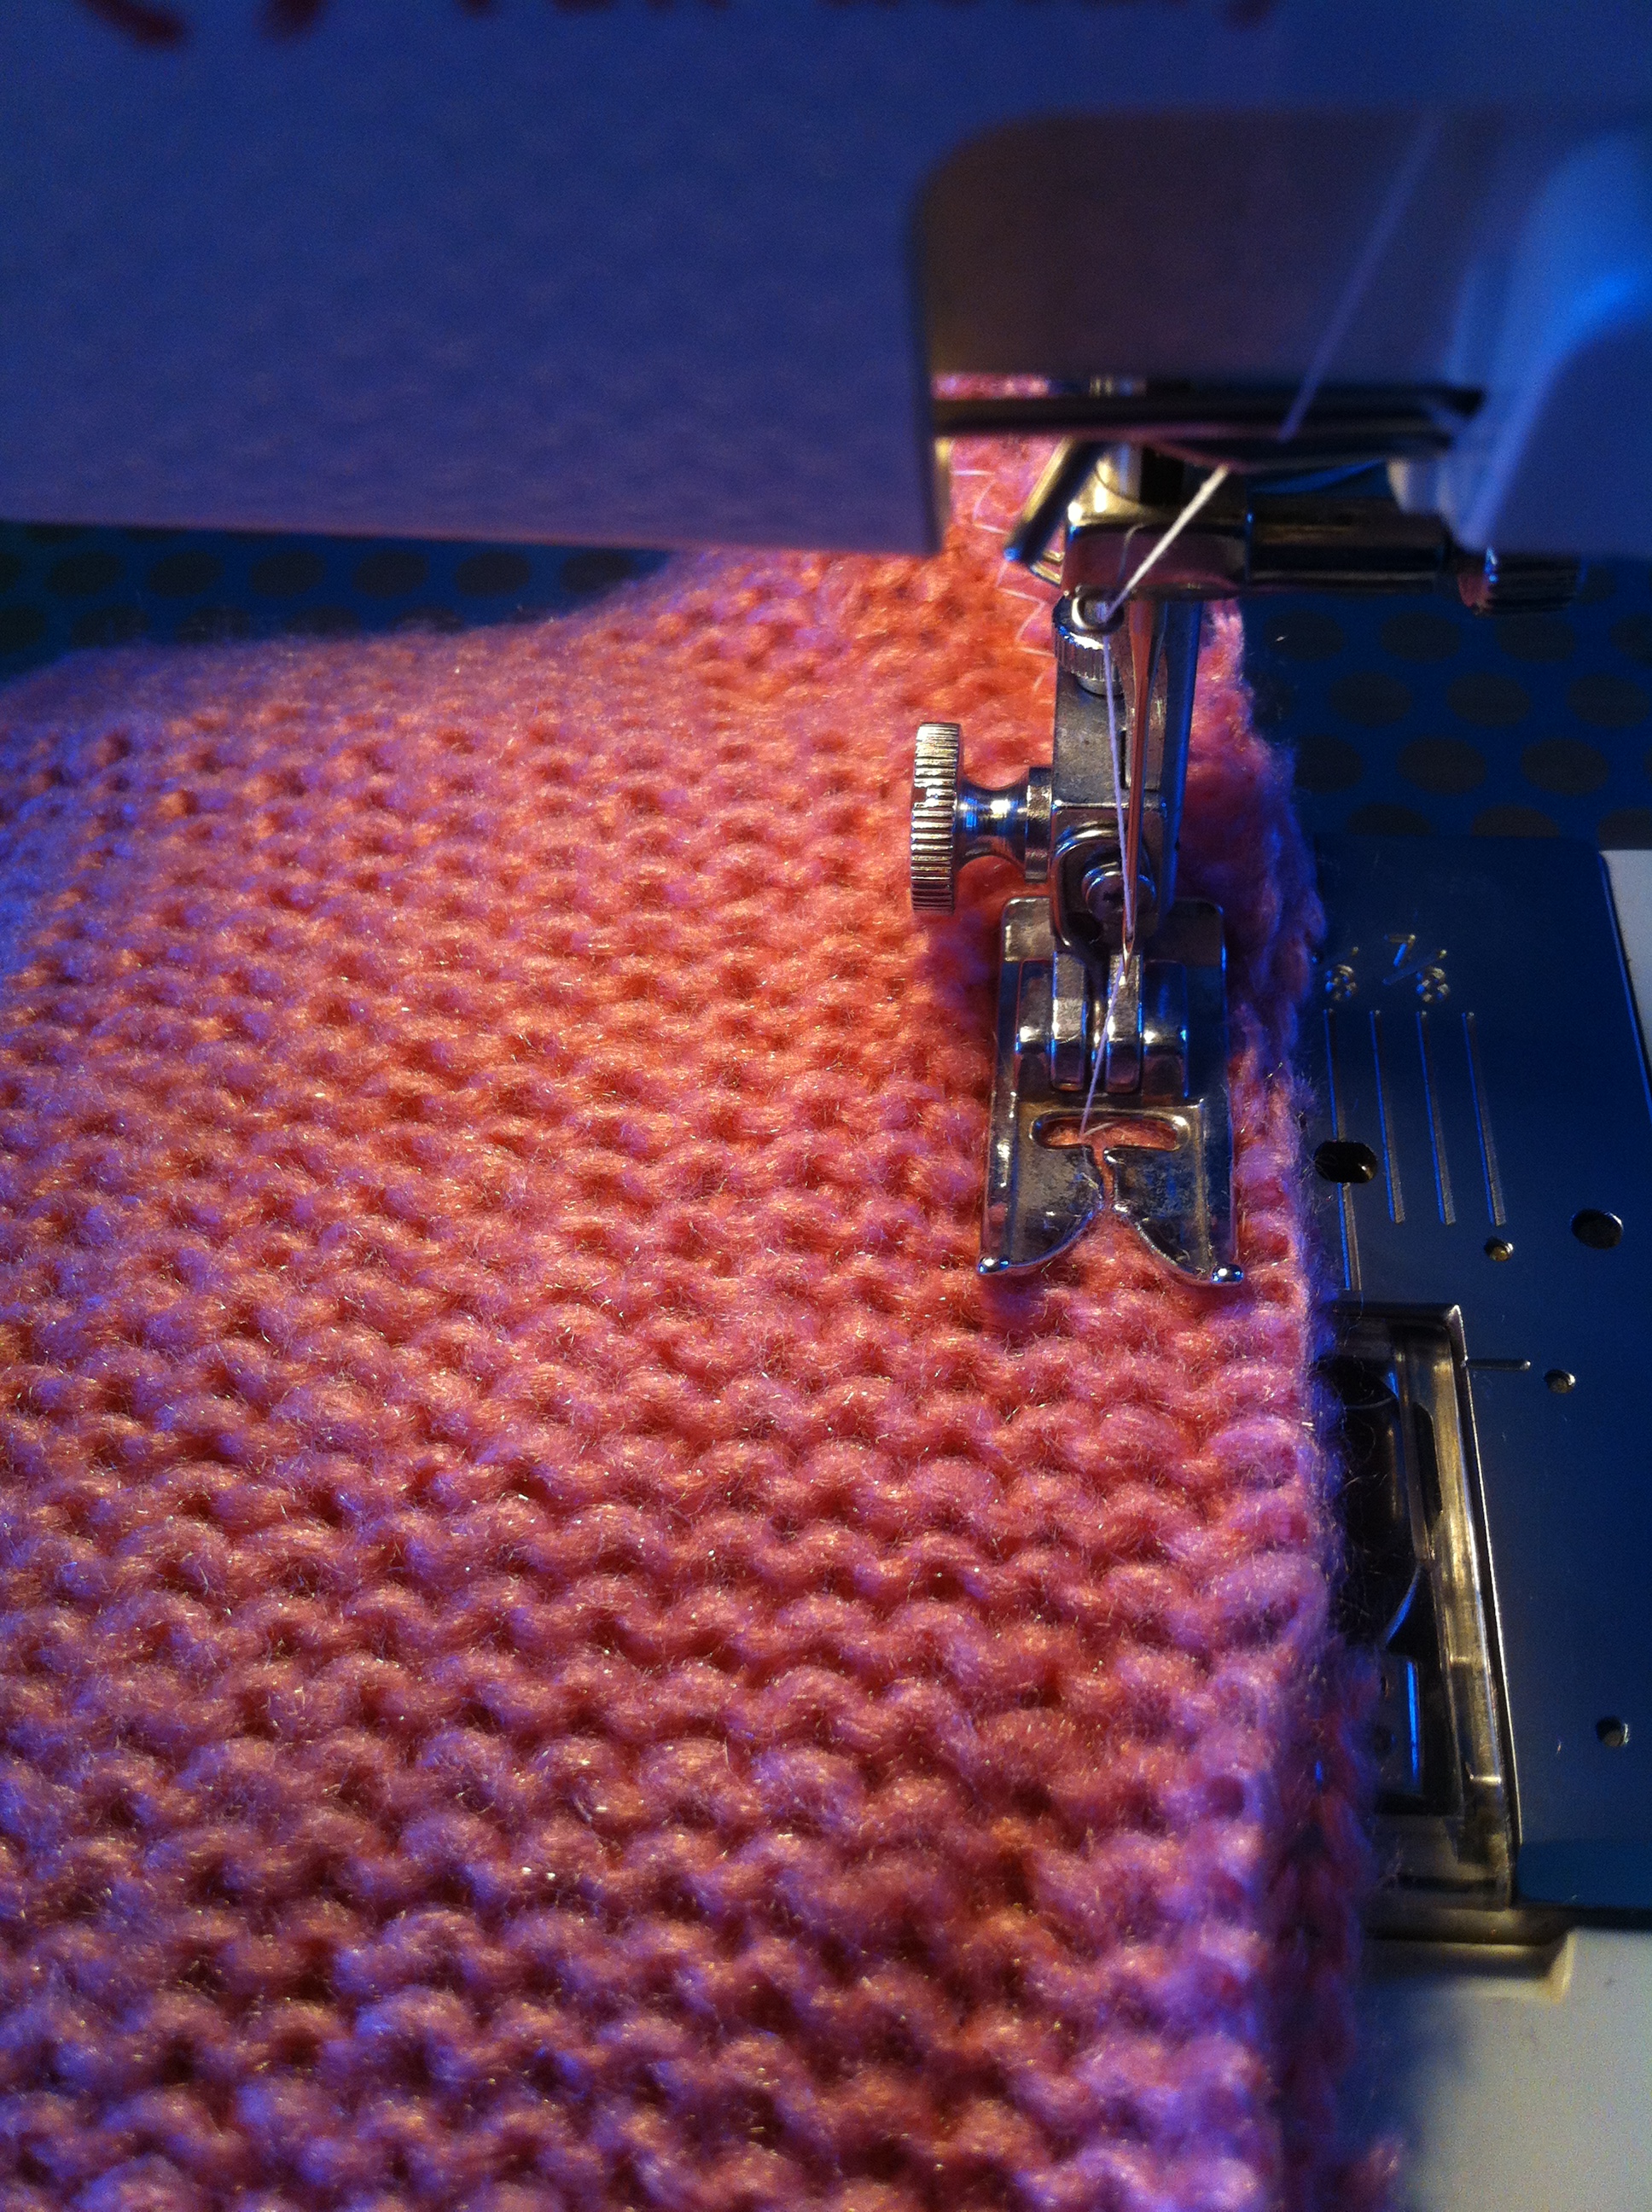
Fold up the bottom one cm and zigzag stitch.

Your hem will look like this

Now fold the legwarmers in half lengthways and stitch up the backseam. I used straight stitch then went over it again with zigzag to stop it from unravelling.
You've got legwarmers already!!
Now we're going to distress them a little!
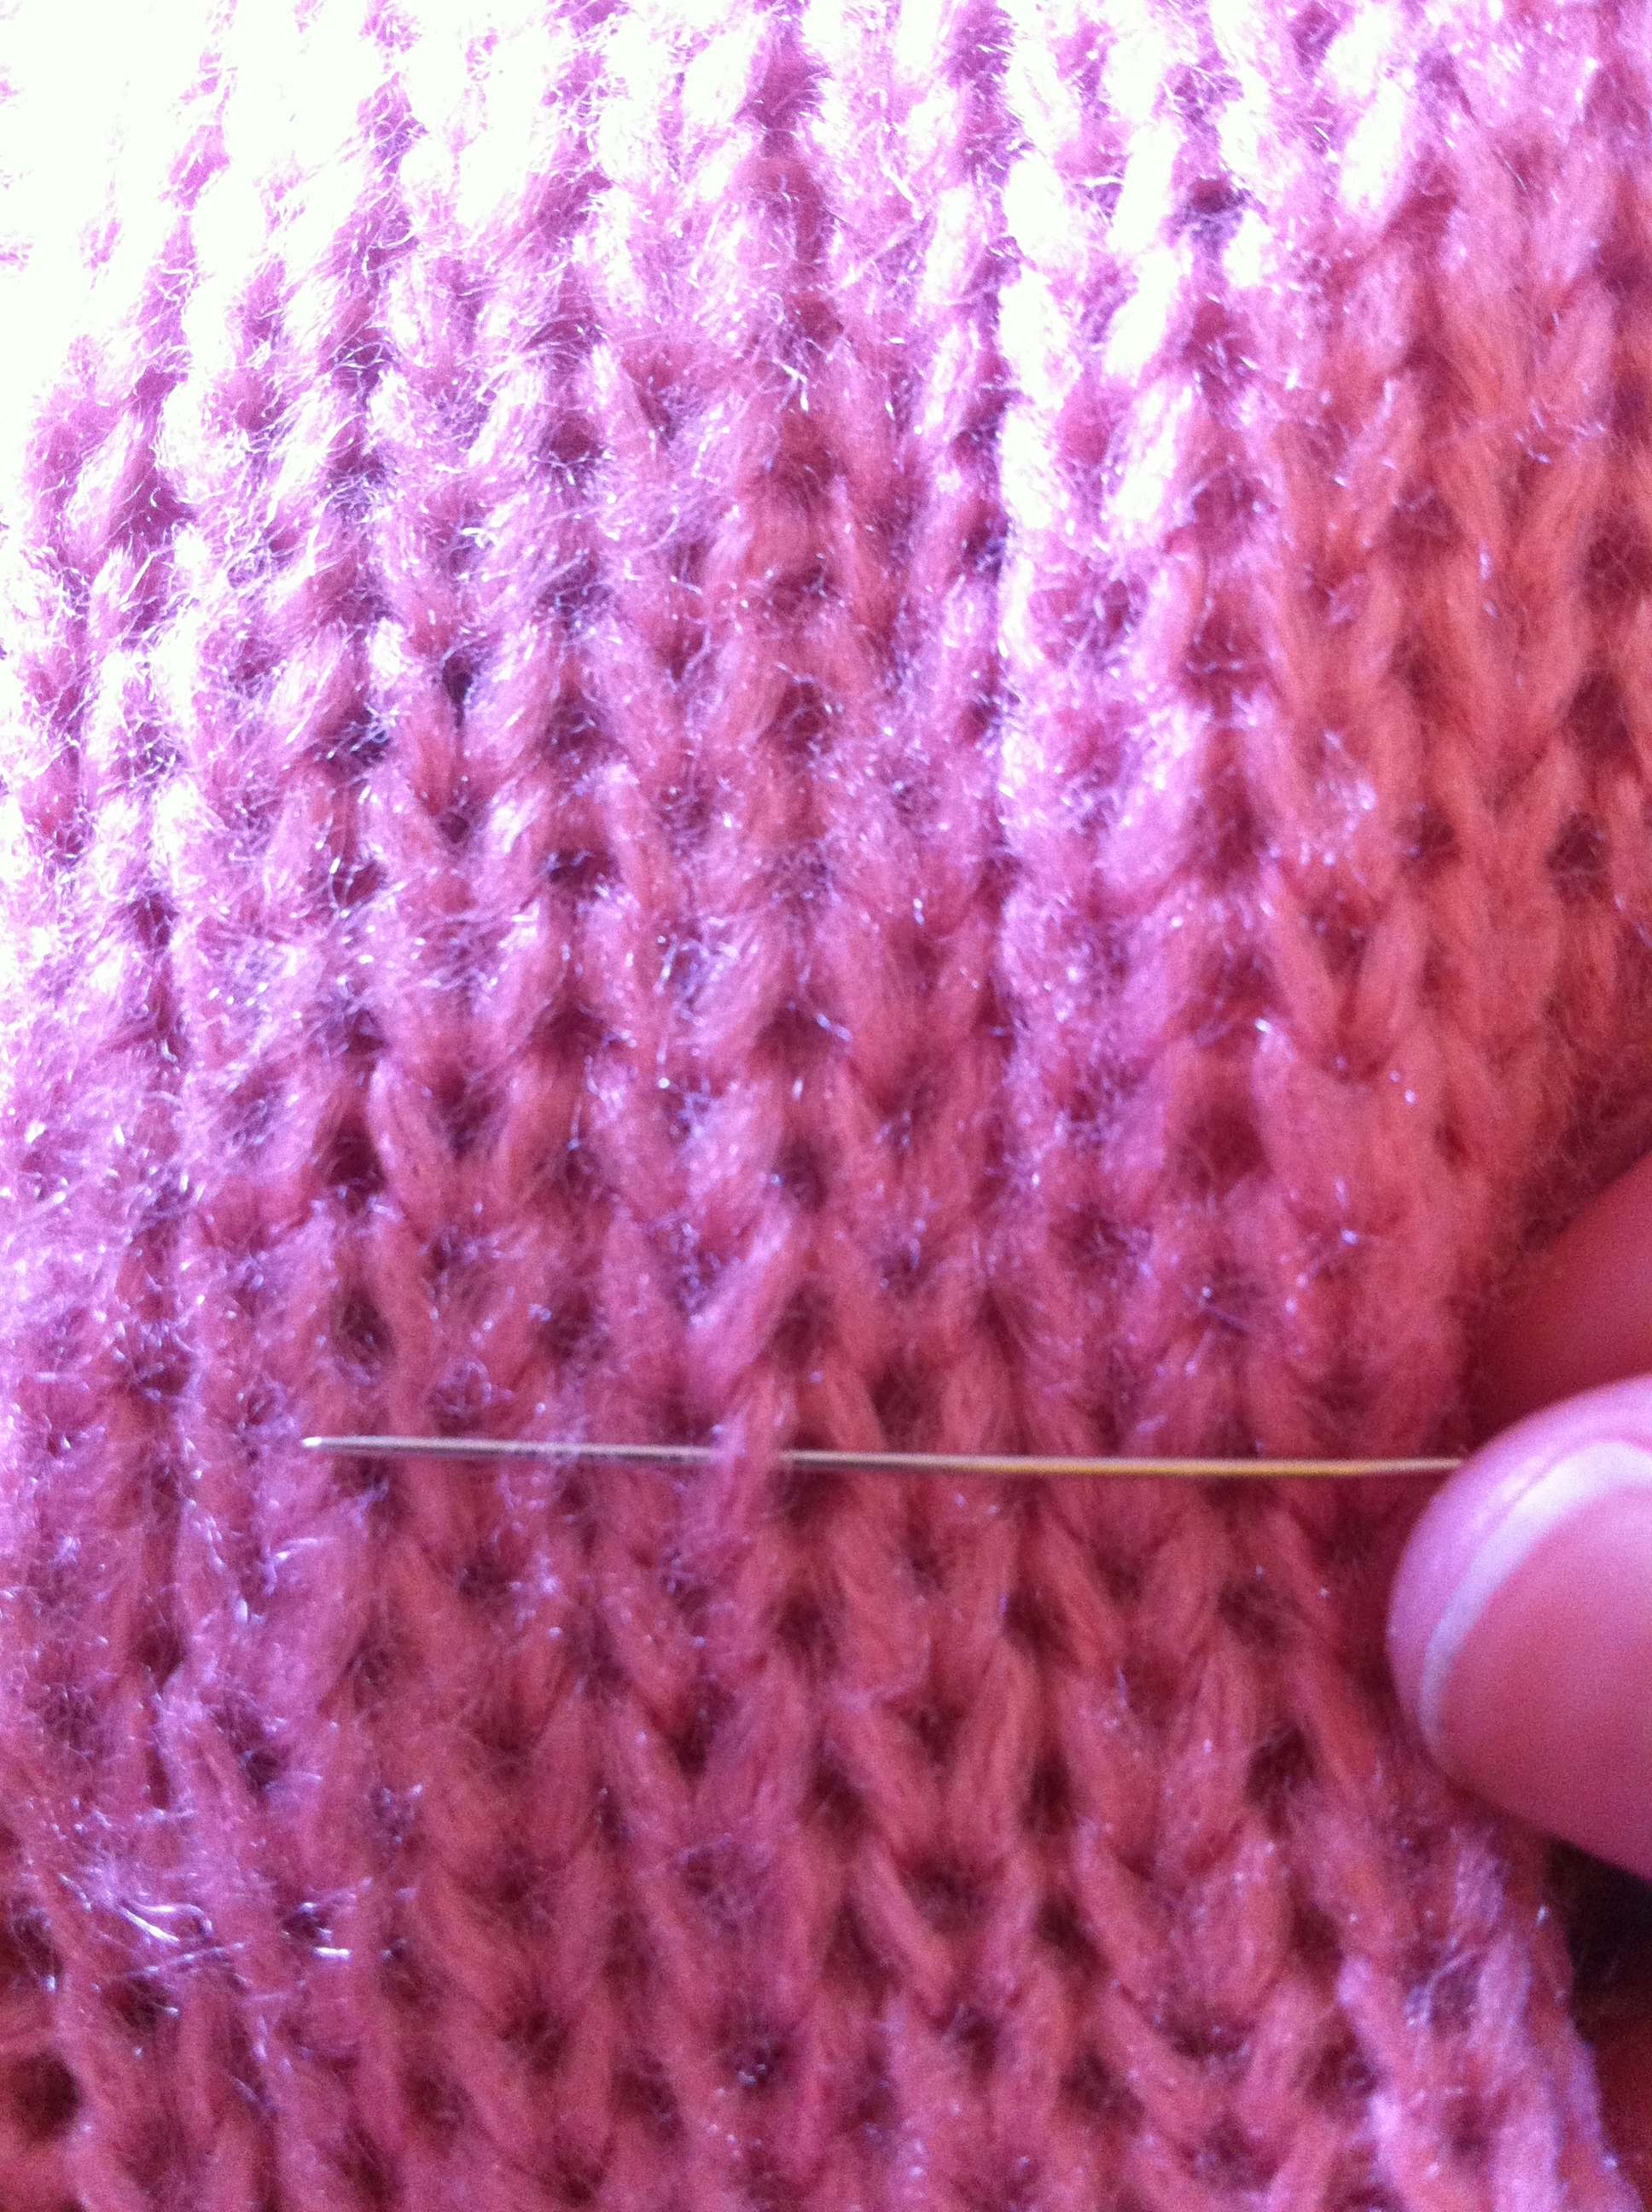
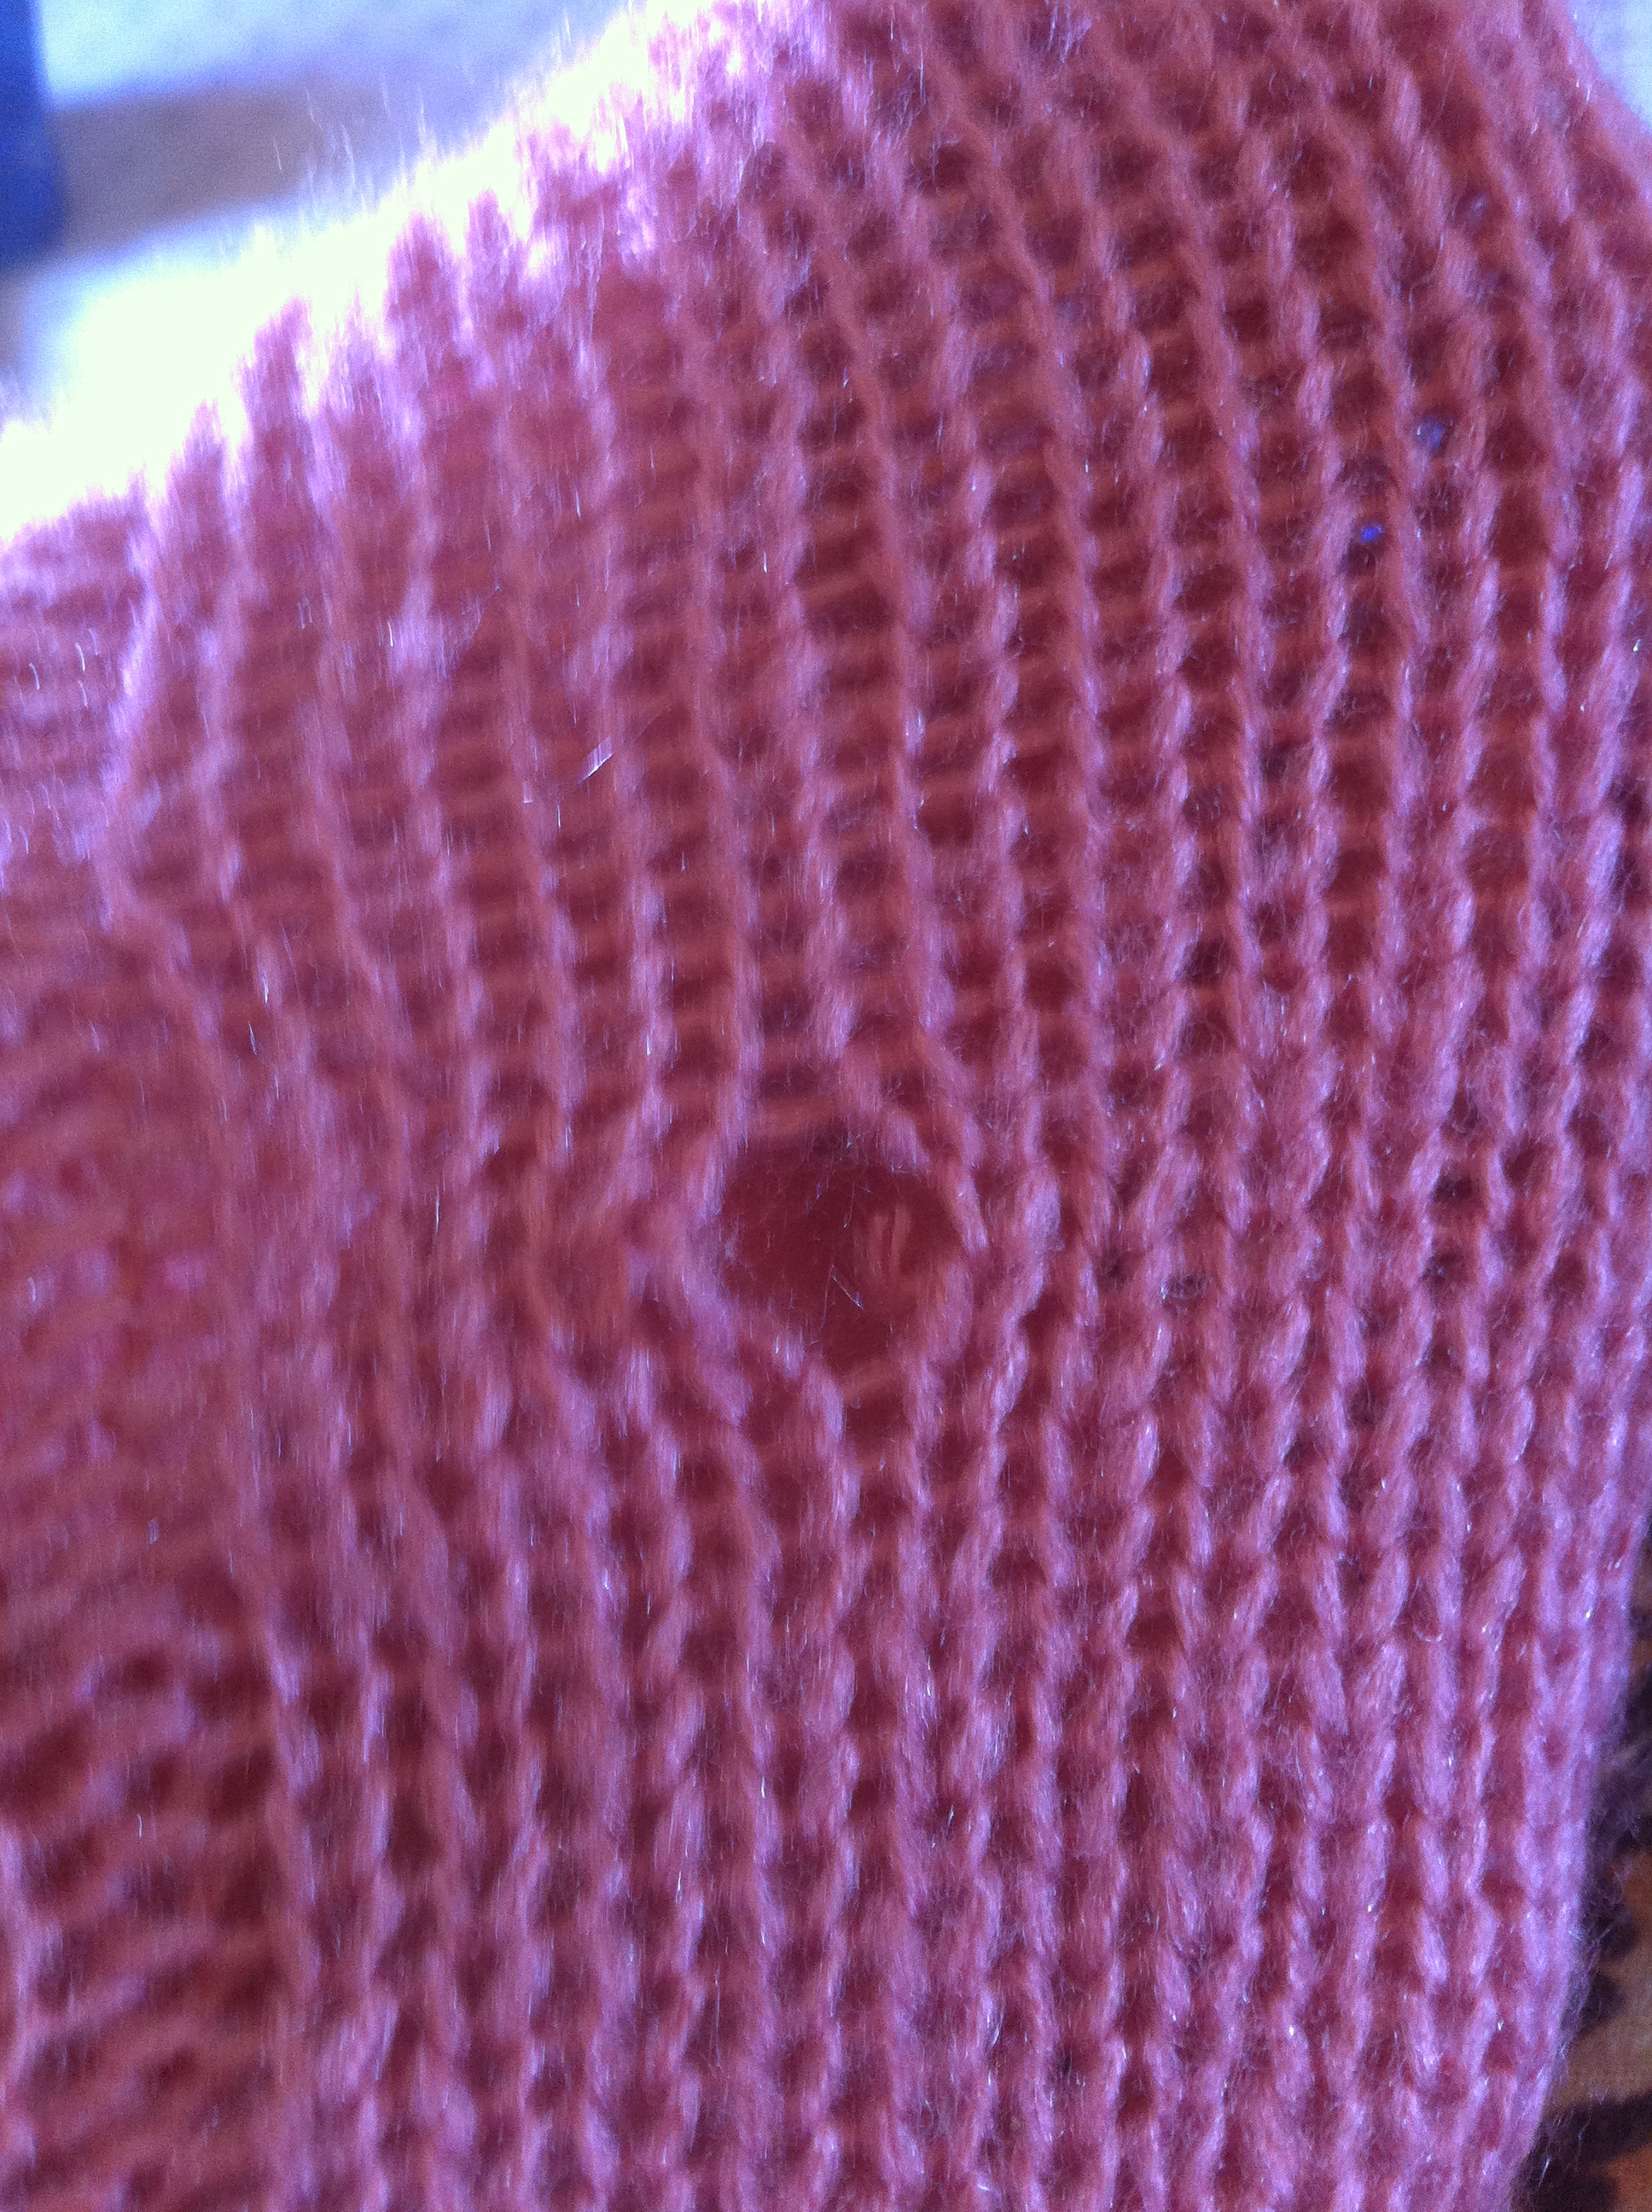
With an unpicker or small scissors, snip one of the vertical stitches. I marked the stitch I snipped with the pin in this photo:
Tug on it a little and you'll already have a hole.
Now you can leave it like that and put lots of little holes all over your legwarmers, but I wanted some cool distressed lines, so I pulled at the snipped threads at the sides and made my hole wider.
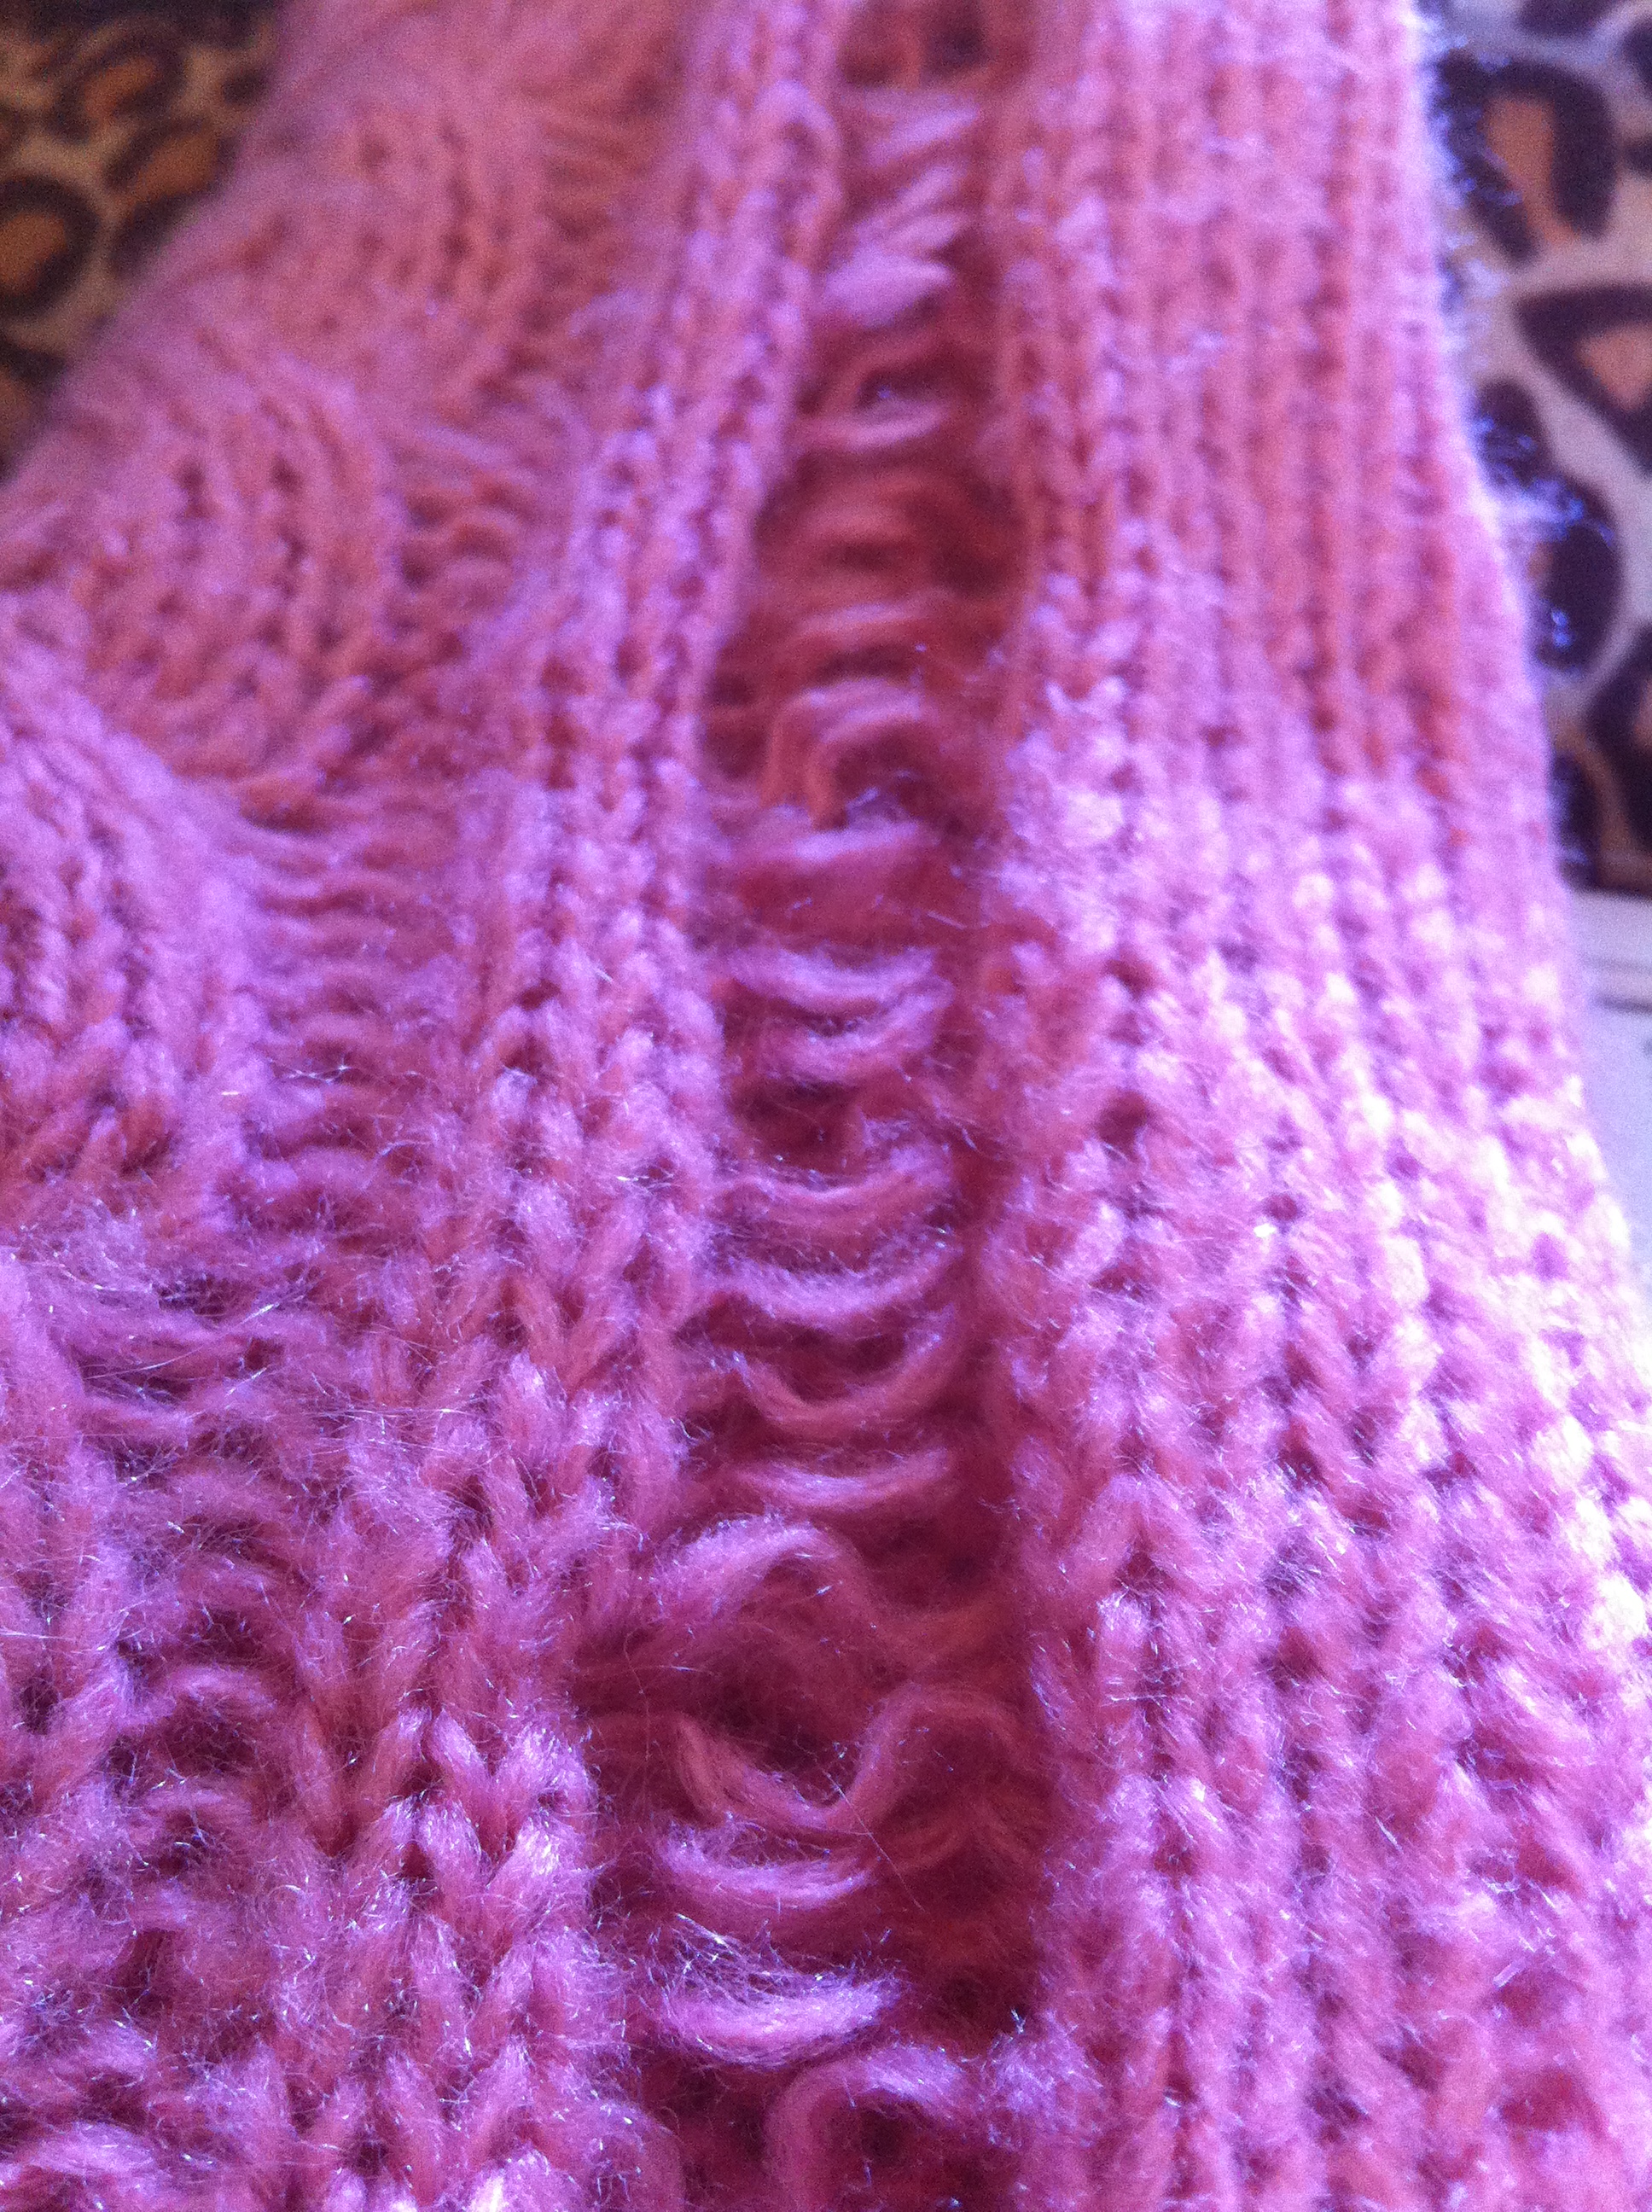
Then I tugged on this loop at the top. Pull it down far, then you'll see a small ladder appear. Keep tugging on each 'rung' of the ladder up and up!

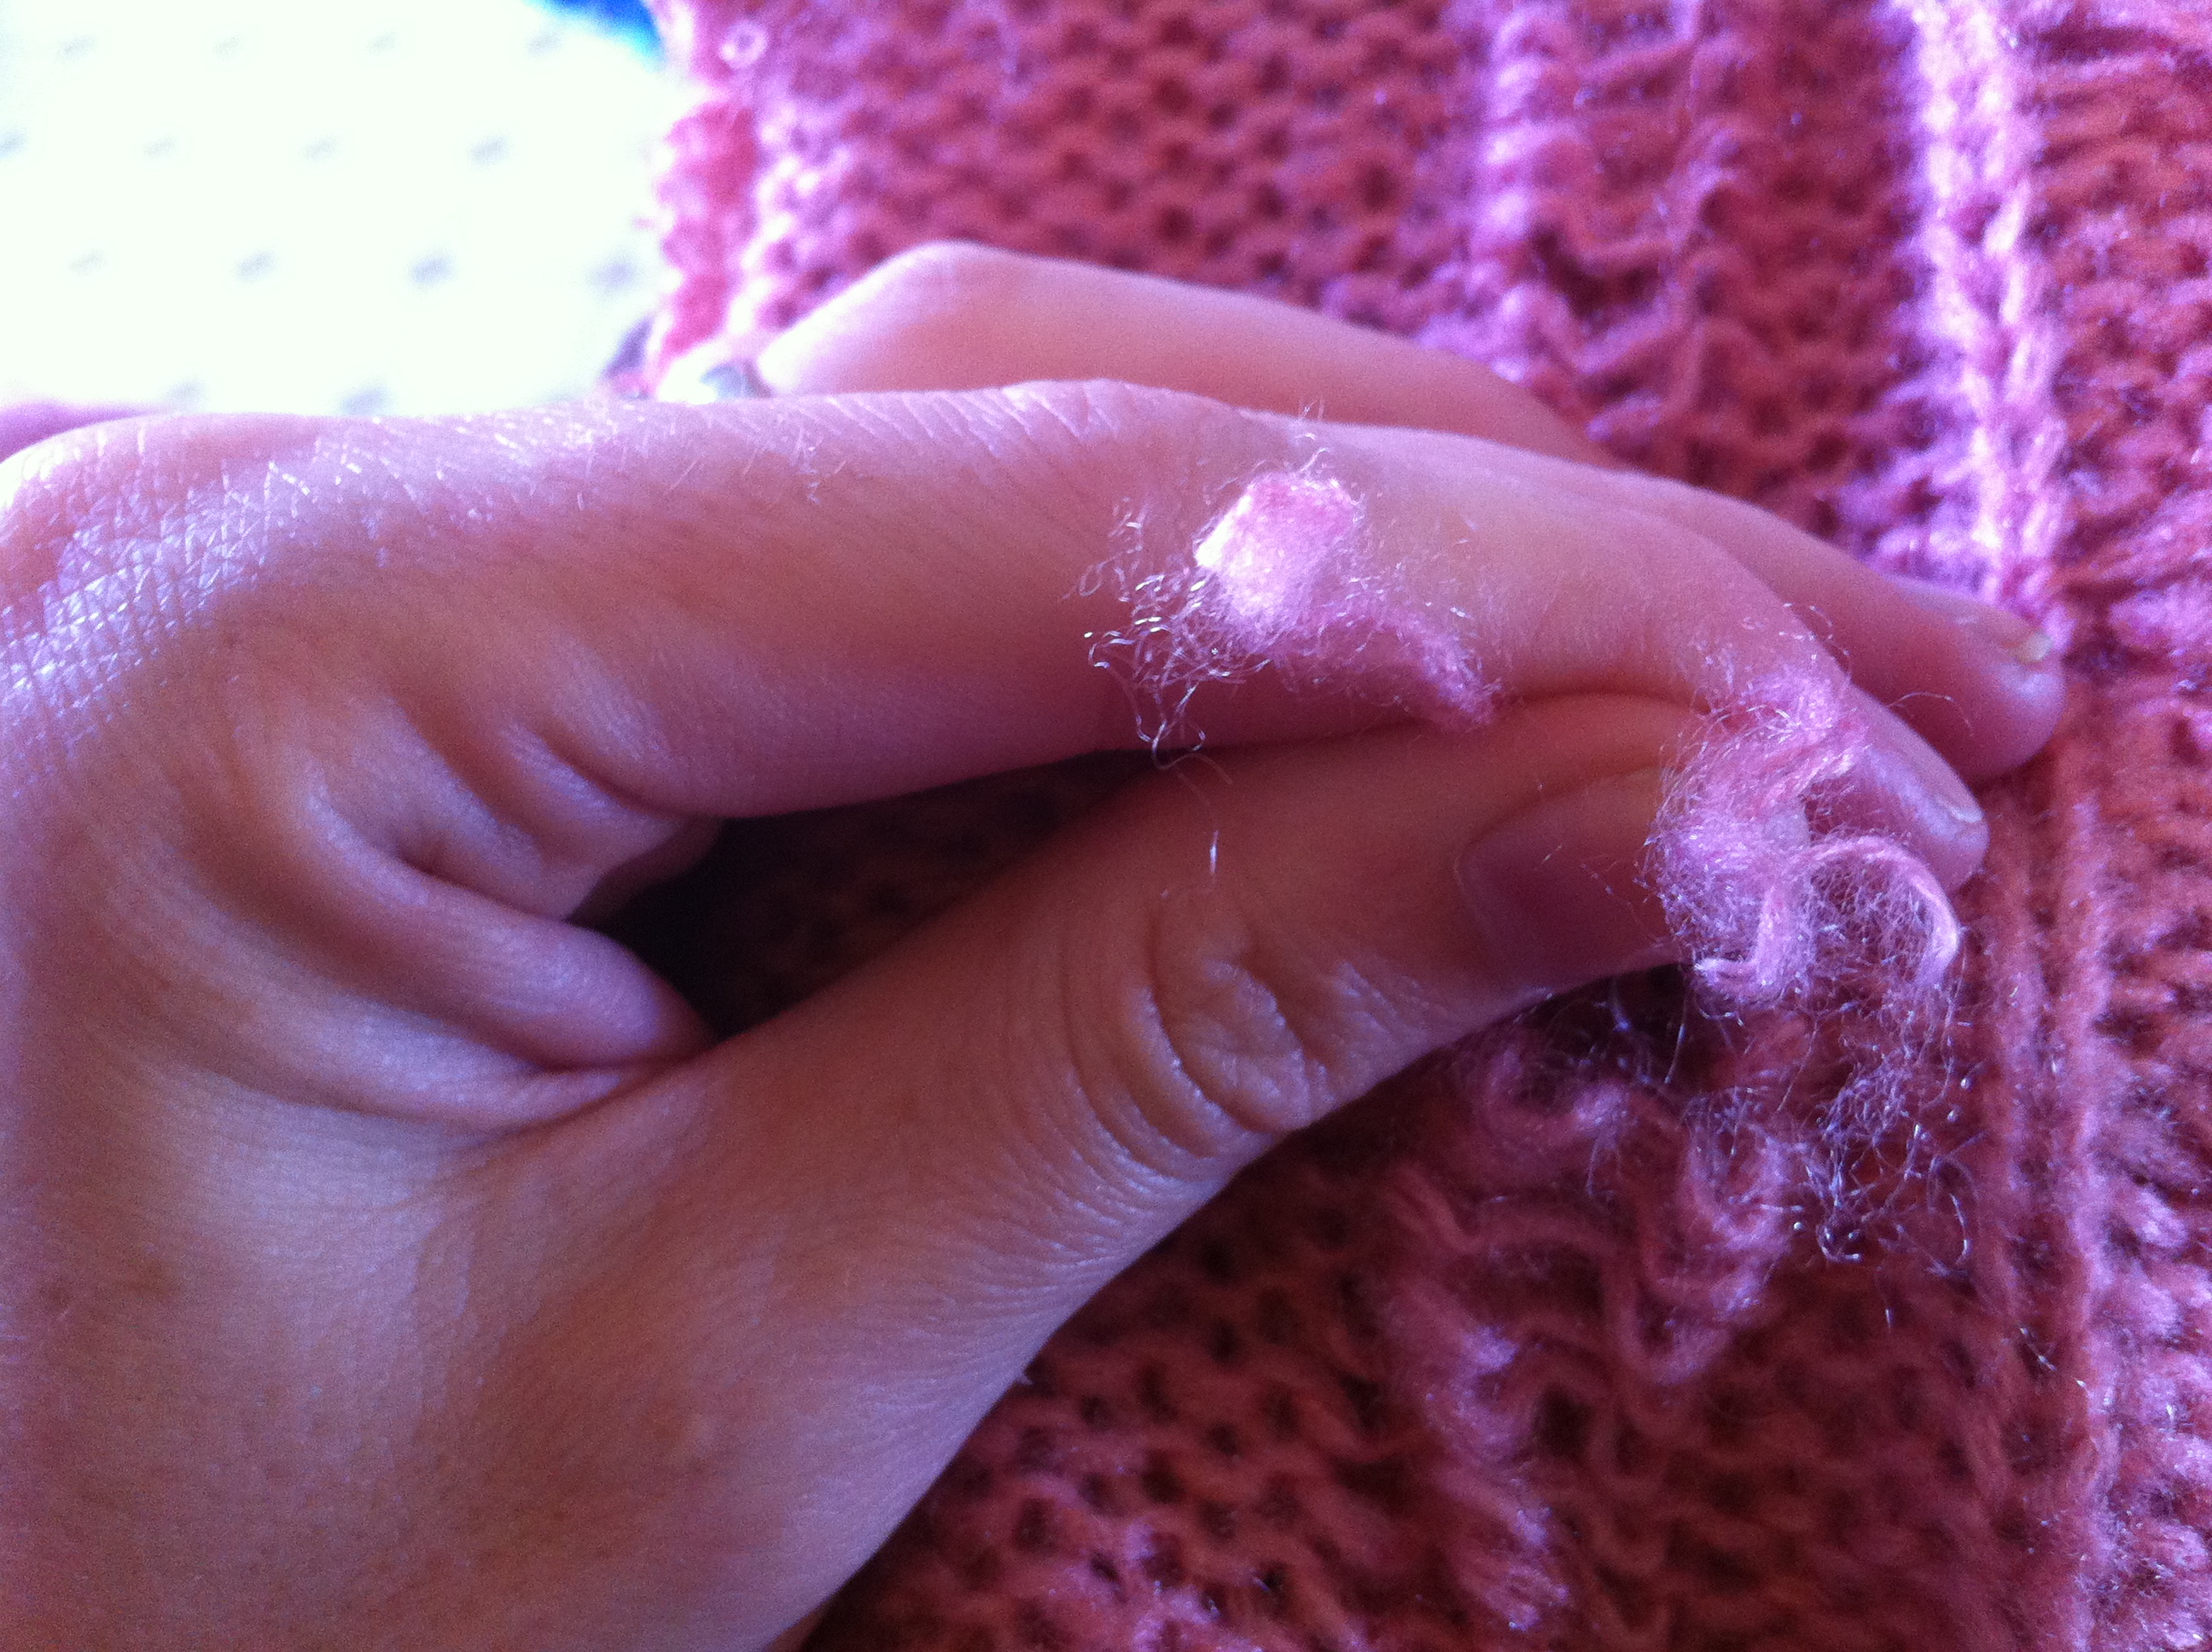
I 'walked' my fingers inside the legwarmers, catching my fingertips on the ladder and dragging each little bit down. You get a good rhythm going with practice.

Make it as long as you like. You can always go back to the original hole you made and make it wider again too.
Turn your legwarmers inside out and find that thread that you snipped to start with. Tie the two ends together.

And you're totally done!


 • www.max-california.com")

4 comments
Oh wow... I desperately need a pair and need to do an emergency trip to the treasure shop ASAP...
ReplyDeleteThese are way cute! I actually quite like the dusky pink colour, but I can see how it might not be quite "you".
ReplyDeleteThese are so fun! I would love to feature these on Reduce, Reuse, Upcycle. Feel free to stop by and grab a featured button. Thanks!
ReplyDeleteWoo! Thanks :)
DeleteI love comments!