
When I was first asked to participate in Sew Ready to Play I was all like YES IMMA DO JENGA! But then the only thing I could think of was to appliqué the Jenga blocks to a shirt. And that wasn't as awesome as I wanted it to be (And all my other ideas about DIYing wooden Jenga planks were just dangerous). So I sat for WEEKS thinking about what sort of games we played here as a family, and in the end I decided I would make a costume for the video game that Vincent loves the most and re-enacts every afternoon on the trampoline with the gym ball.
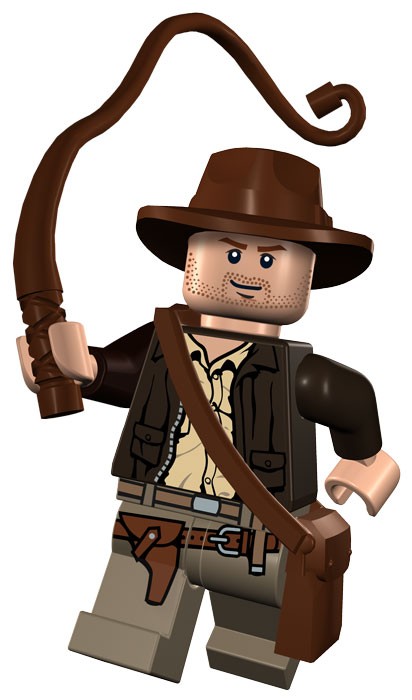
Lego Indiana Jones!
 |
| (obviously not affiliated with Lego or Lucasarts in any way ^_^ ) |
As our son, there was no question Vincent would eventually enjoy playing Xbox. Don't worry, he's only allowed to play it maybe twice a week if he has been SUPER good. He does enjoy jumping around on the trampoline pretending he is Indiana Jones (He used to call him the Lego Cowboy) with the gym ball pretending it's after him (you know! The big stone boulder scene in Raiders of the Lost Ark?).
So I thought that since the kid has the best imagination, I would make him a Lego Indiana Jones costume! Today I'm going to show you how to make a Lego Indiana Jones shirt. It looks a little complicated, but I promise it's basically just an embellished t-shirt!
Using freezer paper I made a collared shirt stencil and painted it onto the front panel of the shirt. I stitched a zipper into the sides, and although it's a real zipper it's purely for decoration. The shirt also has little a little revere collar and patch pockets.

I have a pattern available for you to download here, which is in a size 4T, however in the tutorial I take you step by step how to make your own too!
You're going to need:
Paper to make a pattern (or the printed pattern pdf you can download here)
About a yard of brown stretch fabric
A scrap of cream/off-white stretch fabric
Brown zipper, it doesn't have to work!
Black acrylic/fabric paint
Freezer Paper
The rest of your sewing supplies!
Now there's a million t-shirt patterns and tutorials on how to make a pattern from a t-shirt, so instead of re-inventing the wheel here, I'm just going to get you to grab a t-shirt pattern you like to use! I have a Pinterest board full of free patterns and tutorials for kids shirts right here, as well as a tutorial on how to make a pattern from a much-loved t-shirt here!
 |
| "I hate Snakes!" |
Okay you have your t-shirt pattern? Good! If you are downloading the free pattern, skip ahead to Stitch It, if you're making the pattern, read on...
Making the Pattern
Trace around the front, so we can start cutting it up ^_^ From the neckline side of the shoulder, draw a line down the front of the front piece. I made it kind of wavy, but you can do it straight if you like it really doesn't matter in the end! I was hoping for the fake jacket piece to look like it was moving, but in the end it made no difference haha.

Once you cut up your line, you will need to add seam allowance on both pieces along that fresh cut. Don't forget to do this! You can either retrace your pieces and add the seam allowance, or just add it when you cut it from the fabric.
Trace around your centre front piece, then flip it and trace the other side.

trace around the top part of the side front piece. It doesn't have to be the whole thing, just the armhole, shoulder, neckline and some of the panel line. Sketch out a revere collar shape. Again I used the Indiana Jones lego piece picture for reference. In the sketch below, my curves are wayyyy too curvy. In the pattern piece available I made it mush more straighter.

Add a seam allowance along the side edge and cut it out :)

You are also going to need a little pocket pattern. I just freehanded this one, it's a basic rectangle with a triangular flap on top. Add seam allowance along all edges.

Now it is time to...
Stitch It
Cut the following from dark brown stretch:
2 x sleeves
1 x back with the centre-back line on the fold of fabric
2 x patch pockets
1 x PAIR of side fronts (one left and one right)
2 x PAIRS of revere collars (two left and two right)
2 x pockets
We'll be cutting out the centre front piece from contrast later :)
Grab your centre front pattern piece. Sketch a shirt collar and placket (I also ended up adding a little patch pocket). I used this picture for reference.

Grab your freezer paper and trace your sketched fake shirt. I made the lines extend a little bit further out than the pattern piece JUST in case.

Cut out the lines, making them a little thicker

Iron your freezer paper stencil onto the off-white fabric you have.

Stipple the black paint onto fabric witha paintbrush. Don't use stroked, just dab at it. I used two coats. Put it the side to dry, or if you're impatient, hit it with a hair dryer!

Peel off the freezer paper when dry and iron it to heat-set.

We're finally ready to sew! Let's start with the little fake collar!
Place the collar pieces right sides together so you have two left and two right. Stitch around the outside collar section leaving the shoulder section, the neckline and the panel line parts unsewn. Trim close to the edge so you can turn them right sides out.

Turn them and give them a bit of an iron :)

Now let's do the pockets! Iron the angle edges up a cm.

Now fold them up so they form a flap.


Iron the side and bottom edges of the pockets under a cm and then pin them to the bottom section of your side fronts. It's up to you where you want them. Stitch!

Right. Here is where all the construction is going to go down and your shirt will now take shape very rapidly! Get your fake revere collars and place them ontop of your side fronts. Cut the zipper in half, so the tracks are two separate pieces. Pin them ontop of the collars with the tracks facing down onto the collars.

Cut out the centre front piece now.

Pin it face down over the zip (obviously removing any pins that were underneath). Using a zipper foot, stitch down this line.

Once sewn you will have this!


Oh hey look it's already a shirt front! Stitch the front to the back at the shoulders.
We are going to make a neckband now. Measure the width of your centre front piece at the neck, cut a rectangle of fabric this width and the height you want your neckband (remember you will be folding it in half and also seam allowances). Do the same for the rest of the neckline and cut out a matching rectangle from the dark brown fabric.
Sew them into a loop so you have a neckband.

Pin & Sew to neckline and then assemble t-shirt as you normally would!

All done!


 • www.max-california.com")

5 comments
Umm awesome! I would never have gotten there in my brain.
ReplyDeleteThis is so awesome!! I've linked to your tutorial over at Craft Gossip:
ReplyDeletehttp://sewing.craftgossip.com/free-pattern-lego-indiana-jones-costume-shirt/2013/10/20/
--Anne
This is awesome! And I just can't get over how adorable your kiddos are!
ReplyDeleteOh my goodness! this is amazing! I sooooo wish I saw this before I made Owen's Lego Clutch Powers costume. Mine looks sad and lame next to this! ah man. I love this!
ReplyDeleteLove it
ReplyDeleteI love comments!