
EDIT: You can see photos of Eddie in this dress here
Remember this post I did a little while back? I was inspired by Jessica at Me Sew Crazy to do a Winter Collection. I only managed to complete one of Vince's pieces, but I did all of Edison's!
This week I'll be showing you each piece I made, as well as how I went about it. Some of them I made from scratch, some are from mish-mashes of other tutorials and patterns and I'll explain how I did it. I'm not able to do full tutorials or upload patterns right now, but I will do it in the near future! All this stuff is so little! I made most of the clothes quite plain and basic lines so they are easy to mix and match!

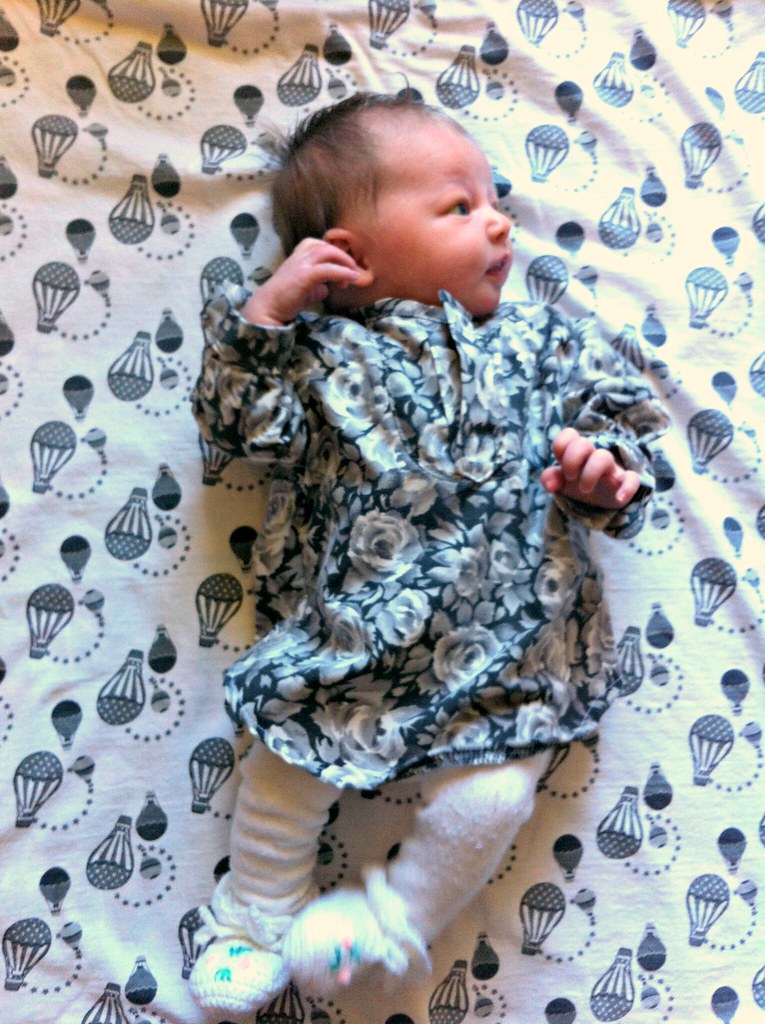
The first is this little shirt dress. The pattern of the fabric hides all the tiny details but this thing was ridiculous! I'd LOVE to write a tutorial for it but it would be so fiddly and crazy I'm not sure anyone would even read it!
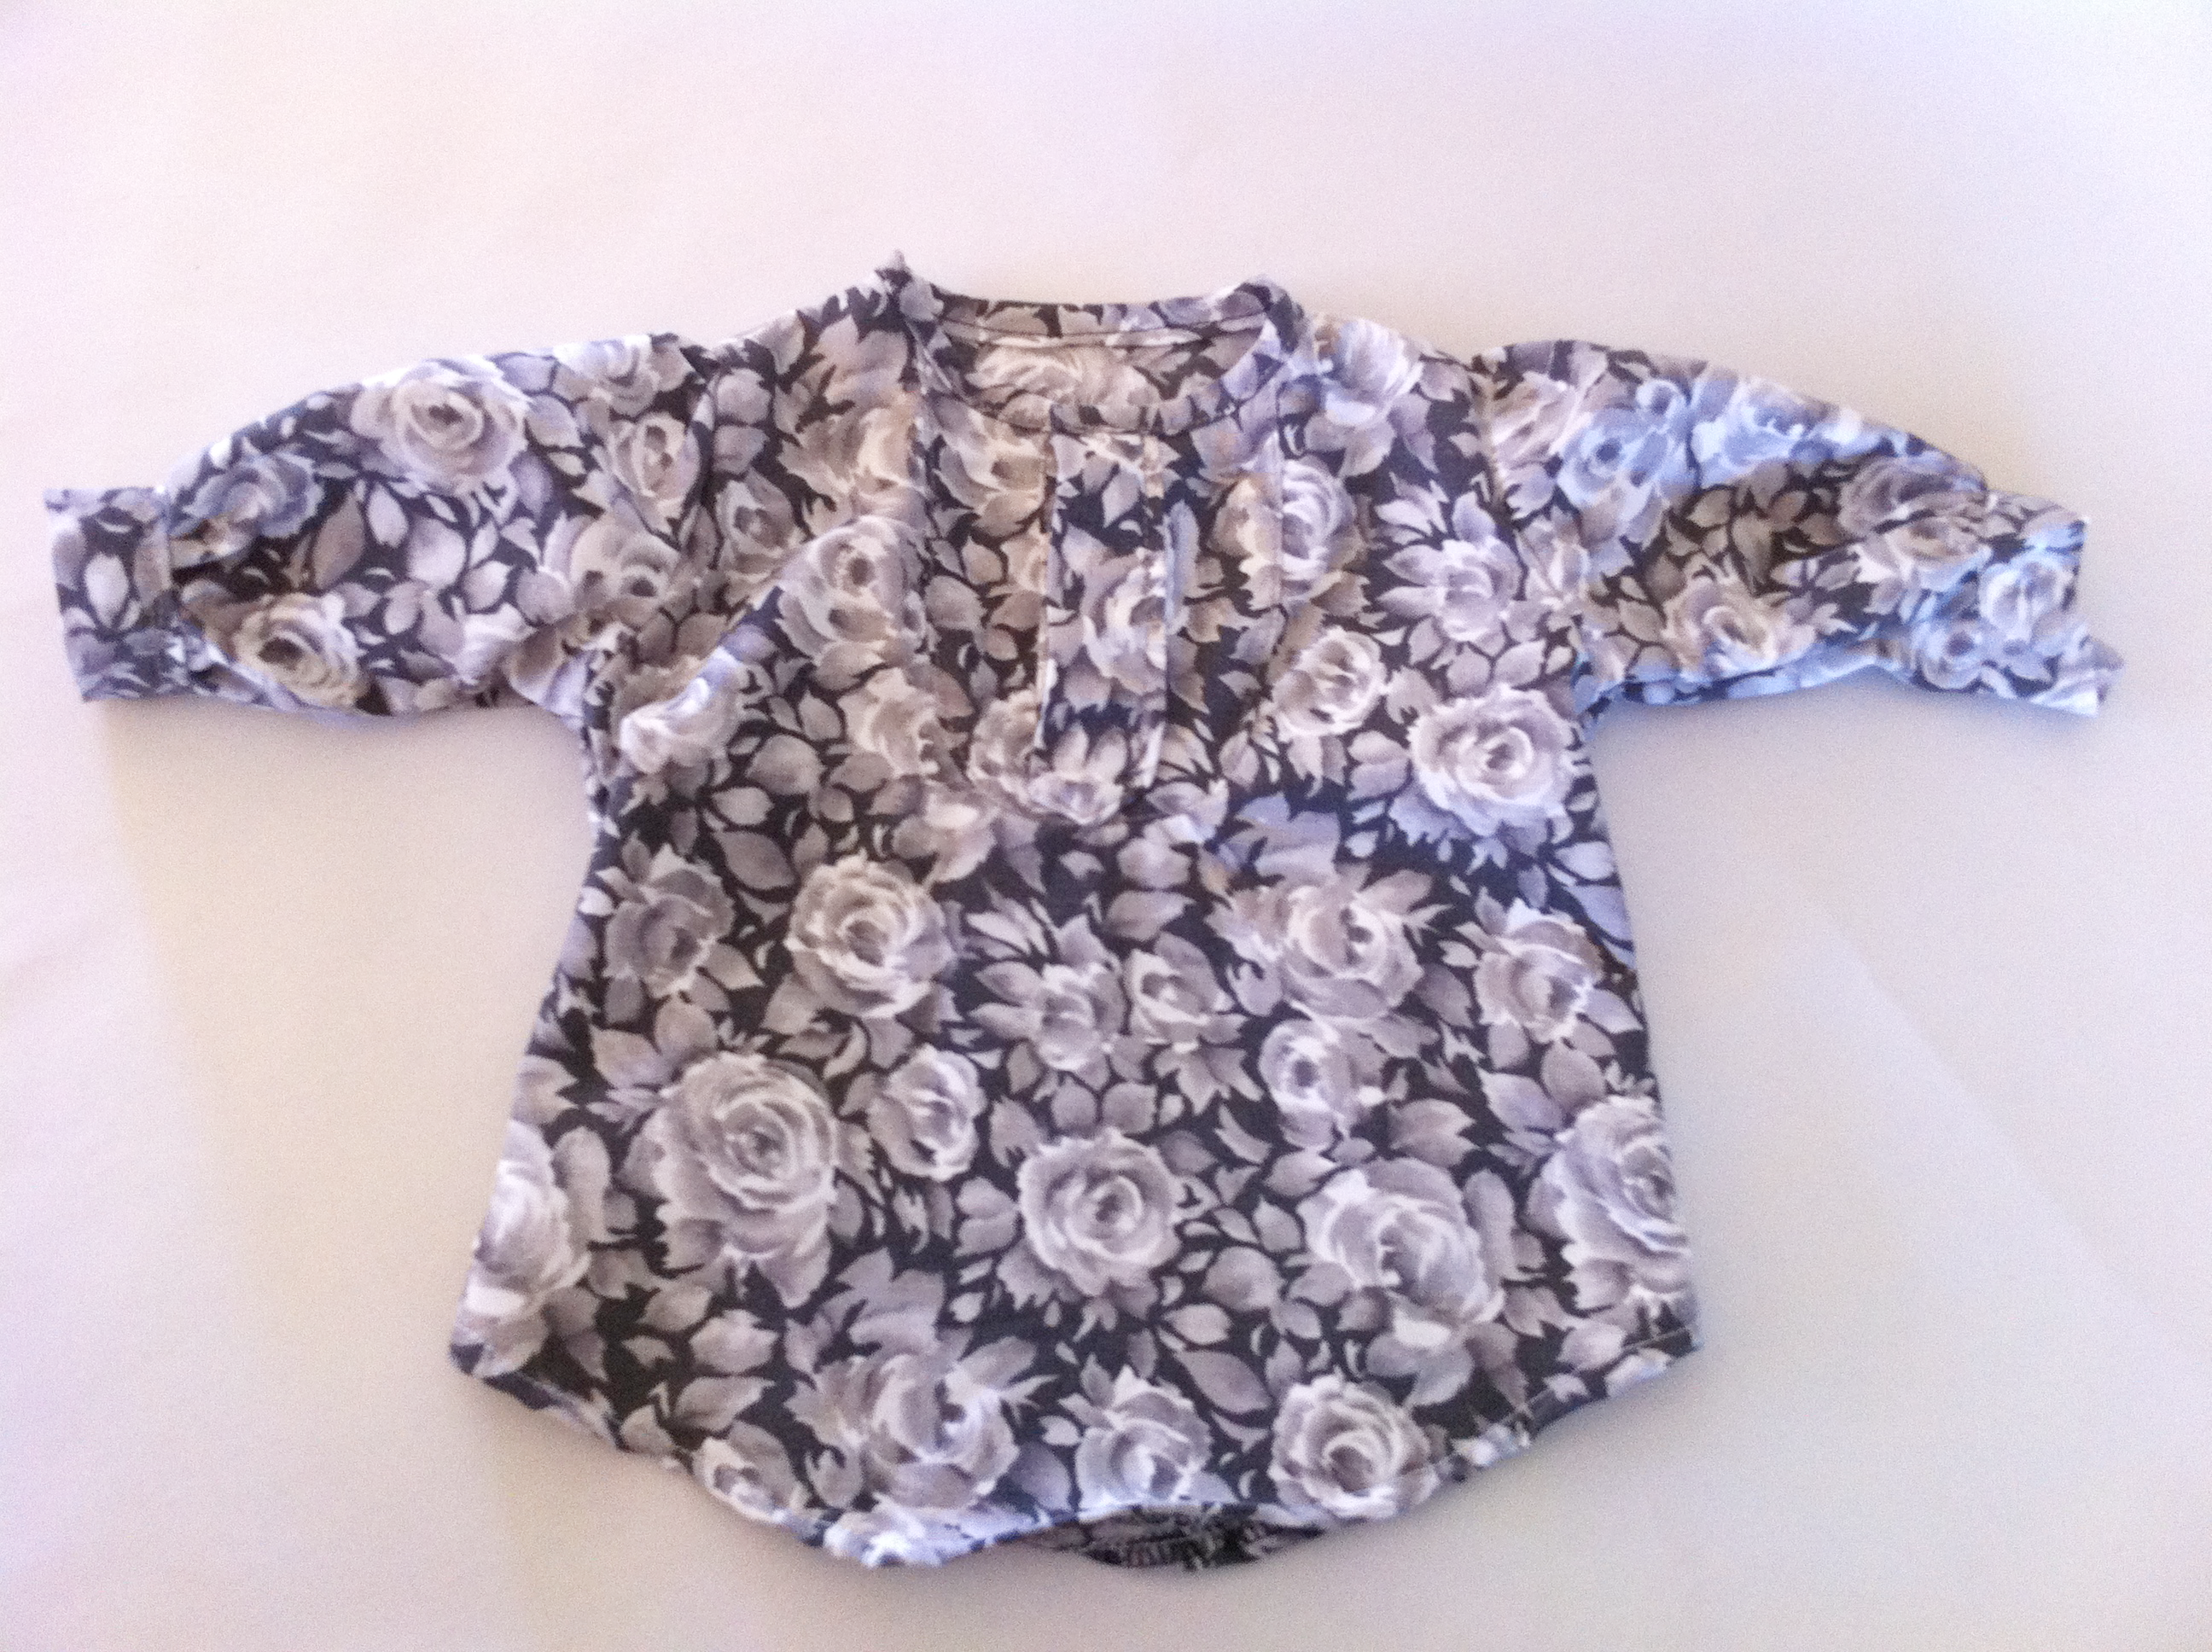
Inspired by this dress by Dagmar Daley, I wanted a shirt dress with sleeves, yoke, placket and cuffs. I didn't really think about the fact I'd be making this in the tiniest size ever, or that I didn't have a pattern at all! Still, it turned out amazing. I'm so so proud of it!
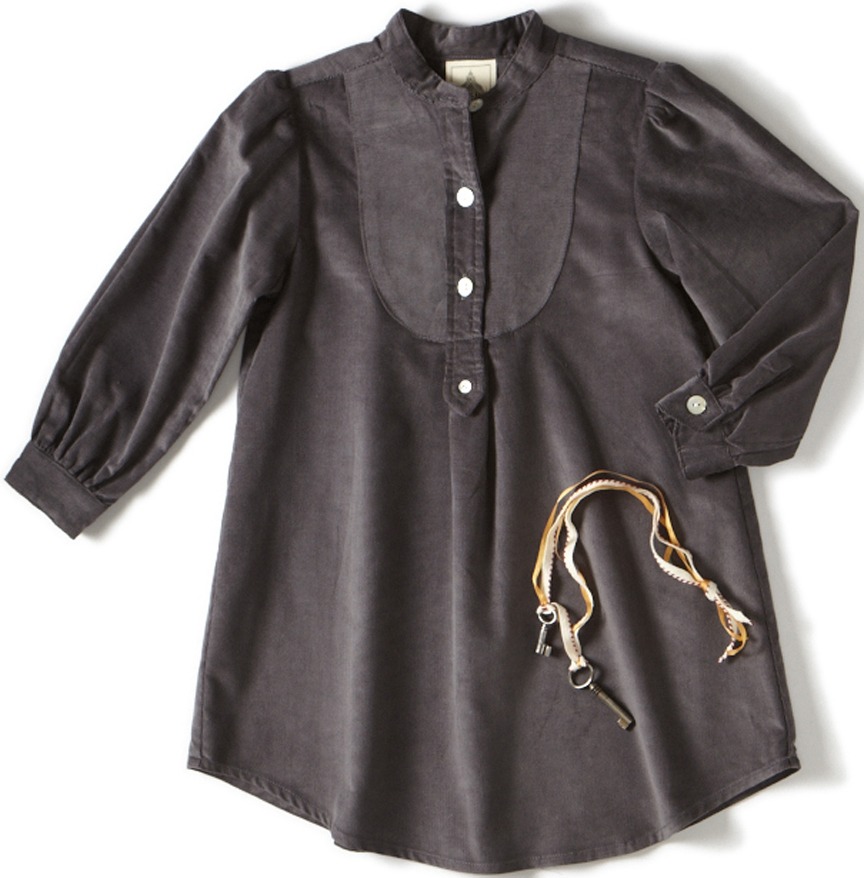 |
| Inspiration: Mika Dress by Dagmar Daley |
The base of the dress was constructed from the Billie Blouse pattern you can download for free at Petit Citron. I really needed a small pattern with set-in sleeves to start me off, and the basic shoulder and sleeve shape of this pattern was what I wanted.
I swapped out the button up front to place it on a fold, tracing out a separate yoke too. Slashing the centre front I added a placket the same way I did the plackets on the sleeves.
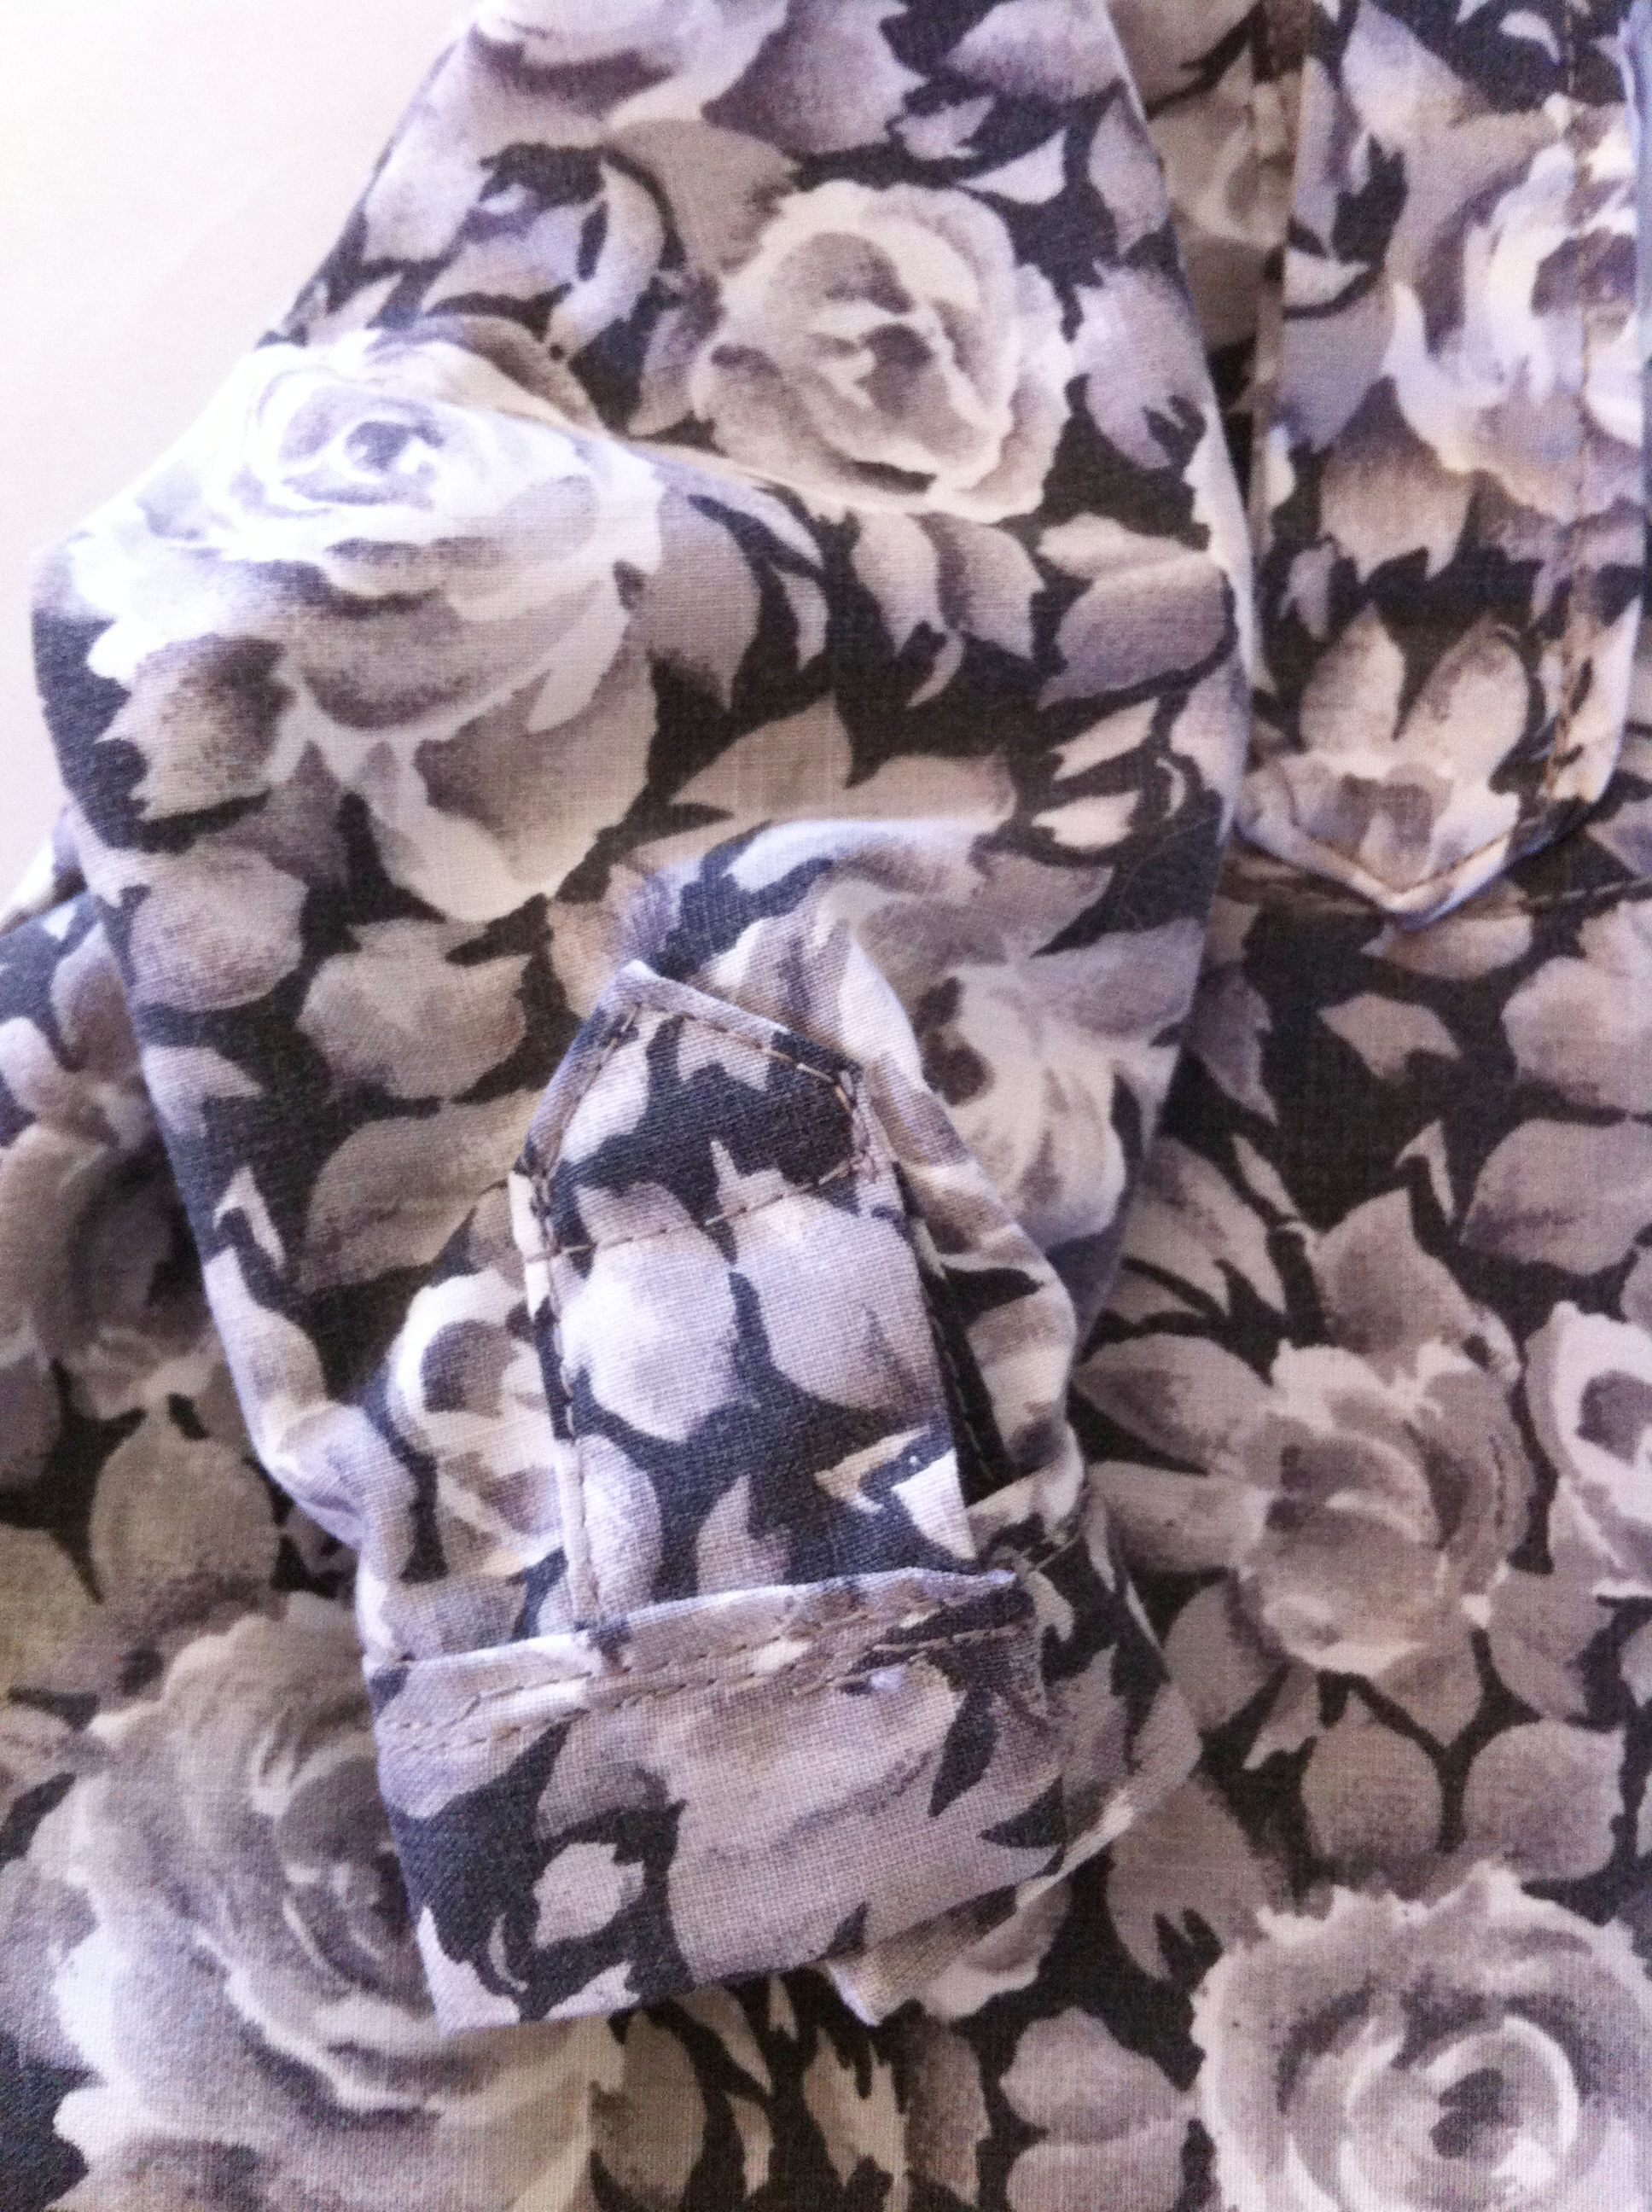 |
| Sleeve with teensy cuff and teensy placket |
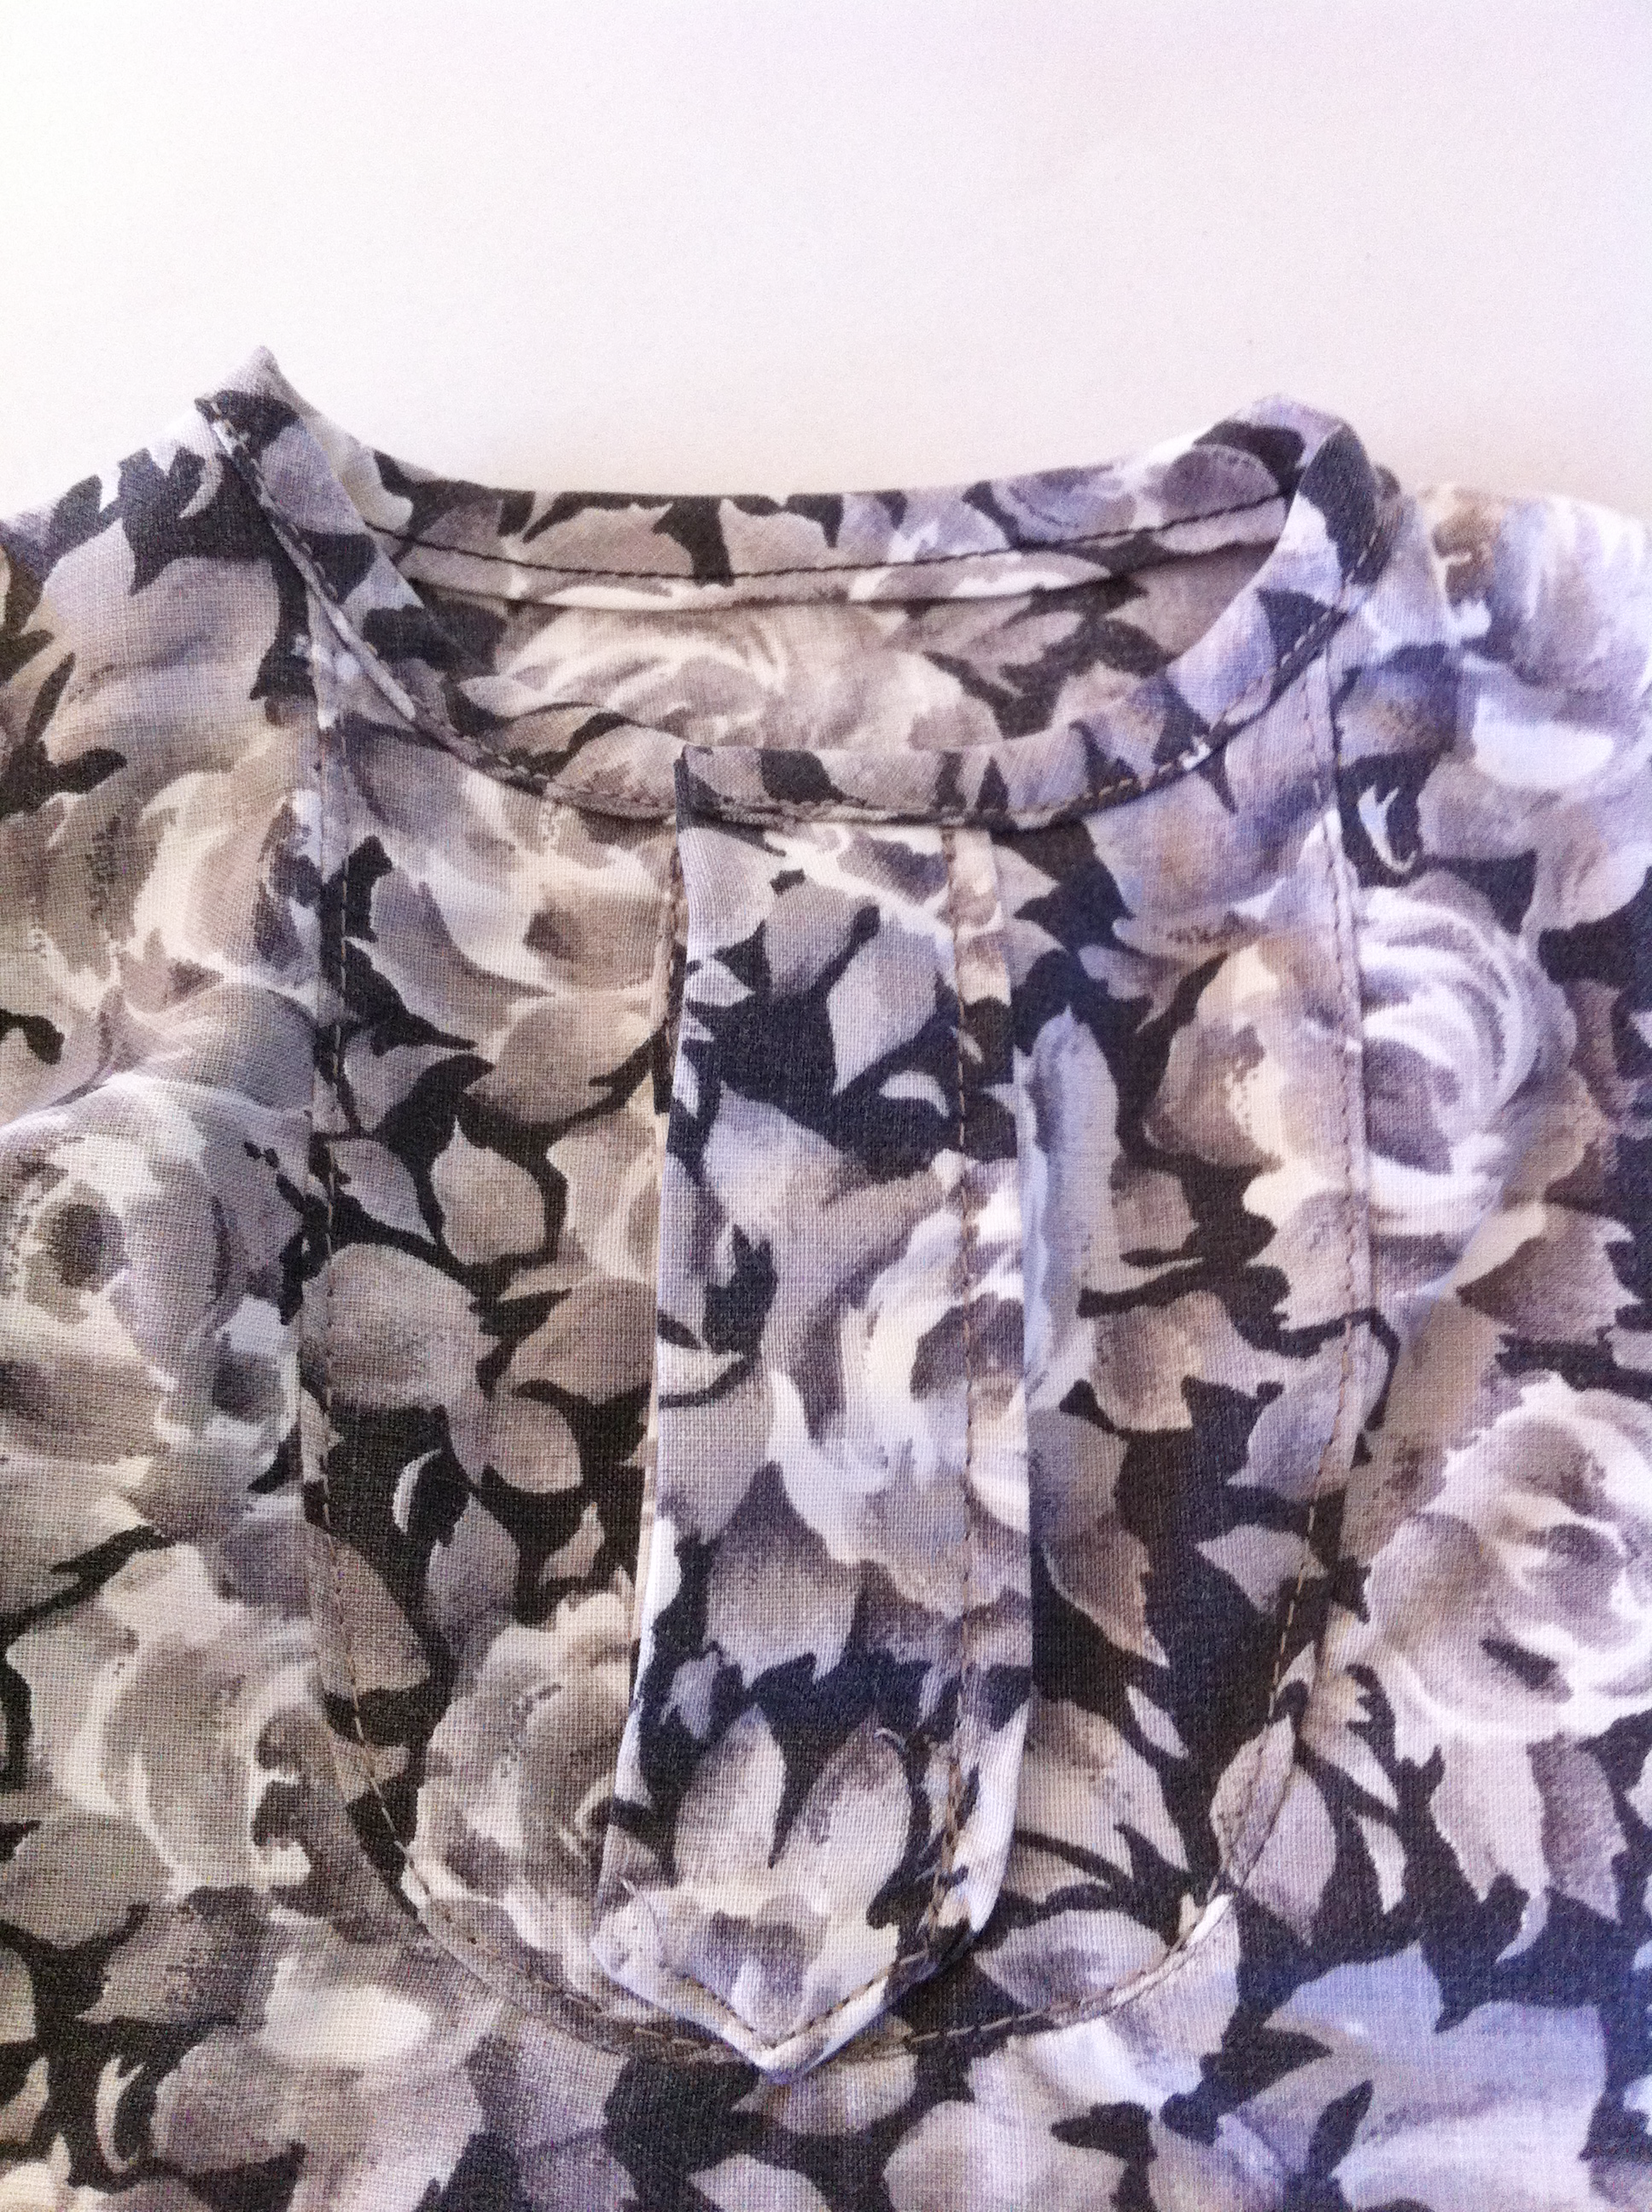 |
| Bound neck with yoke and placket. |
I still need to add buttons to the front and the sleeves, but I think I might go with some snaps.
I'd love to do this again and make another Wednesday Addams dress but out of woven fabric instead of stretch like the one I made earlier. It would look really good in plain colours, so all the small details aren't lost.
If you like, I can upload the pattern pieces I made, but I probably won't be writing a tutorial for it any time soon


 • www.max-california.com")

7 comments
OMG, that is darling!!! You did such a fantastic job! I love the floral fabric too, great choice. :)
ReplyDelete-Ashley
http://distractedashley.blogspot.com
I so badly want to see what it looks like but the photos aren't showing up. I can see your inspiration piece, but not the one you made. :(
ReplyDeleteI am so excited to see the whole collection! I just started working on my Fall collection a couple of days ago :)
ReplyDeleteSo cute! This is amazing. I reckon it would look good in plain colours too, so you could see all the details.
ReplyDeleteThis is adorable! Looking at the clothes you are showing us I really want a girl to sew for :) I find out next week but I think it will be another boy. Thank you for so many fantastic tutorials and inspiration! I love reading your blog!
ReplyDeleteBonnie MS
ridingthebonnieway.blogspot.com
that is darling! Great collection!
ReplyDelete♥ sheldon clothes folder
that is totally adorable!
ReplyDeleteI love comments!